
Making Local Adjustments in Capture One Pro Part 3: The Reason Why Custom Vignette is much better than Capture one’s Vignette Tool
The vignette can help draw the intention to the part of the image we want the viewer to look at. Soft vignette makes the subject look brighter than everything else in the photo.
I don’t recommend using Capture one’s built-in Vignette tool – instead, you should create a custom vignette.
WHY YOU SHOULD NOT USE THE BUILT-IN VIGNETTE TOOL:
The built-in tool only allows you to make adjustments outside the vignette, so you can’t move the centre.
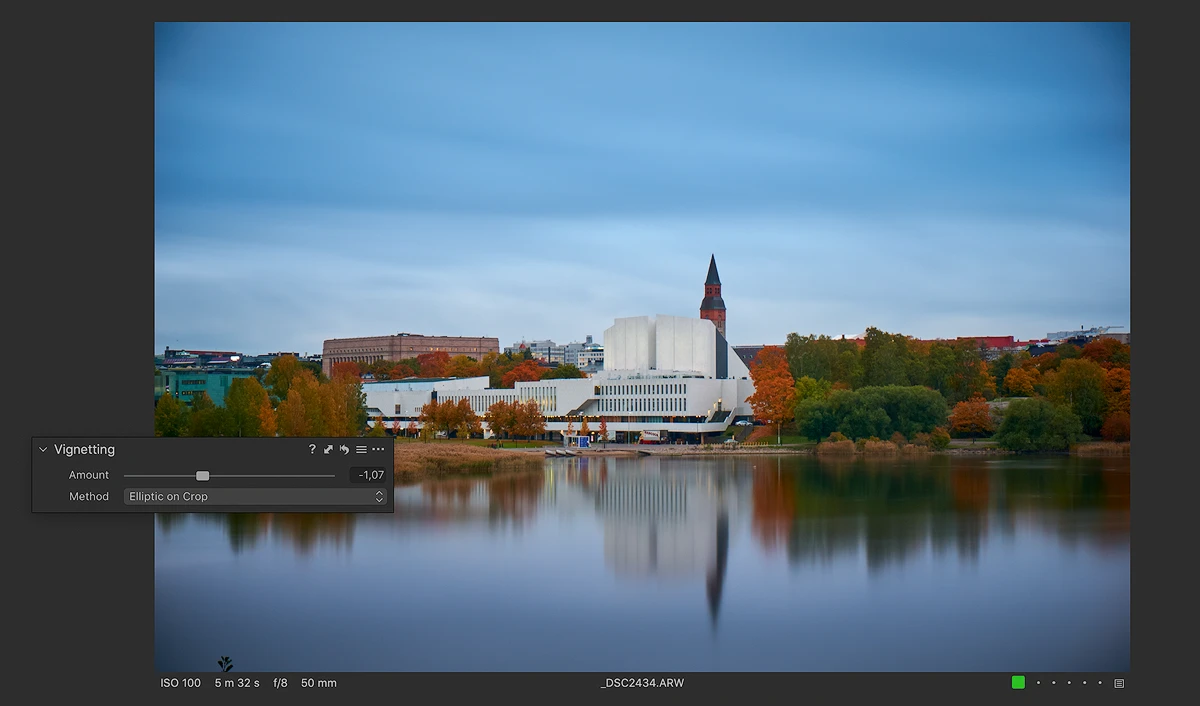
Capture one’s built-in Vignette tool
We rarely place the main subject in the centre of the frame, and by using built-in vignette, it may result to darkening the main subject. Now I will show you how to fix this with custom vignette.
HOW TO CREATE A CUSTOM VIGNETTE IN CAPTURE ONE PRO:
Let’s use the Radial Gradient Tool keyboard shortcut (T) starting by creating a new empty layer. In this case I’ll use the custom vignette with an oval shape, but you can use any shape you prefer. Click and drag to make the shape you liken top of the main subject you want to frame.
Show the red mask to make sure it will effect the outside keyboard shortcut (M)
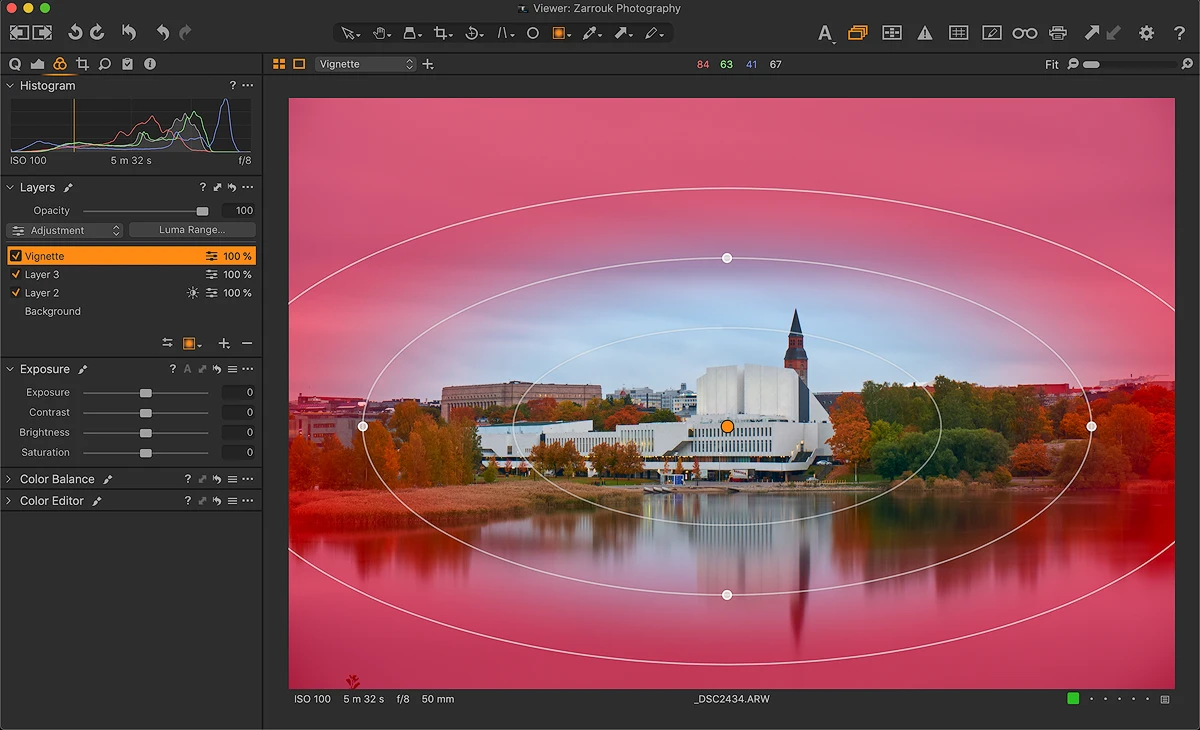
Radial Gradient Tool showing the mask
After creating the shape you like, go to the Exposure Tool Tab. Then lower the exposure slider to add a subtle vignette.
You can also modify the feather of the Radial Gradient Tool with the inner circle, If the edges are visible. check my other blog post to learn more about radial Gradient
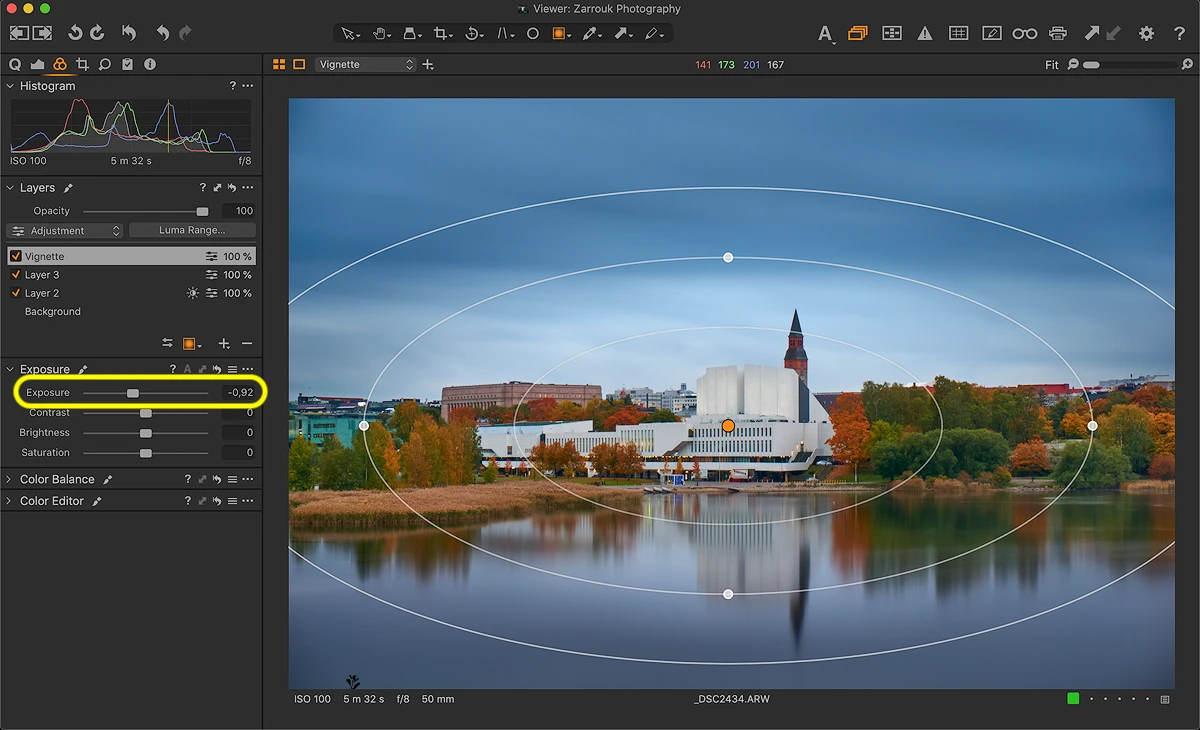
Image after adding the vignette with good feathering.
ADDING SPOTLIGHT
I like to add some brightness to the main subject to make it pop even more.
Start by creating a new layer, let’s name the layer Spotlight, and with Radial Gradient create another oval over the main subject then invert it so it effects the inside of the oval not the outside.
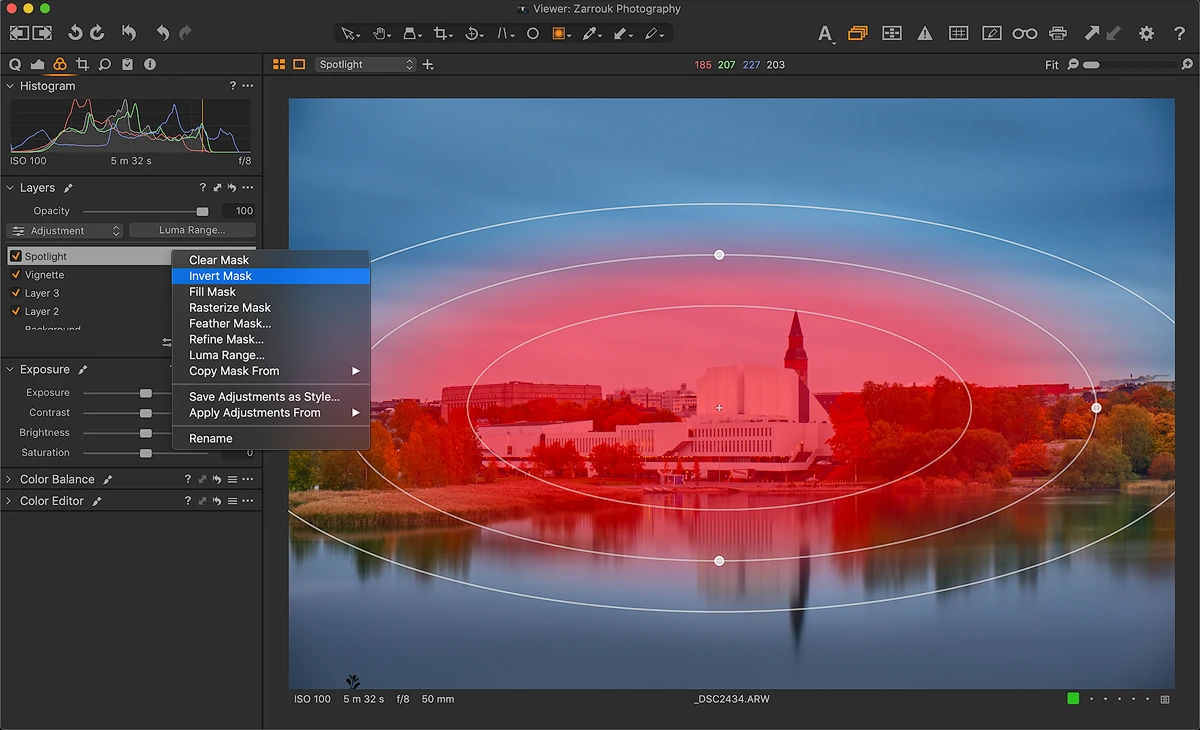
Then increase the exposure between 0,10-0,5 for example. Here I have also used the color balance tool to add some warmth to the highlights.
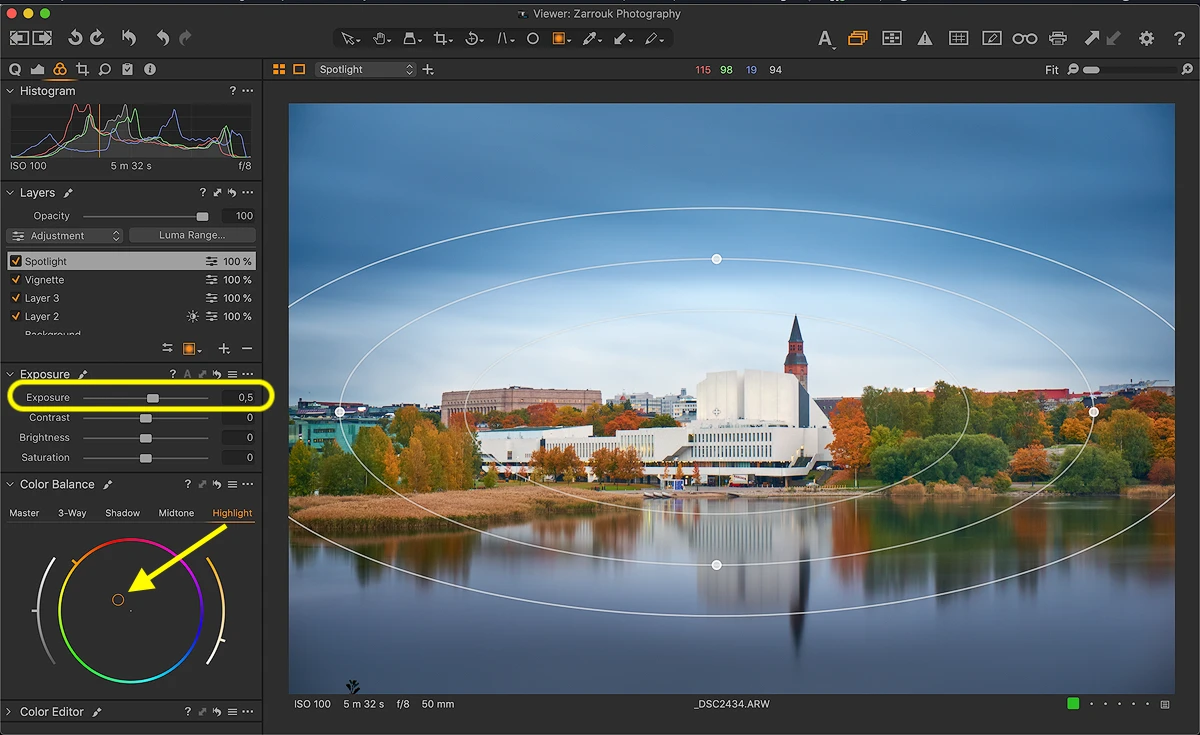
Radial Gradient Adjustments exposure and adding Color
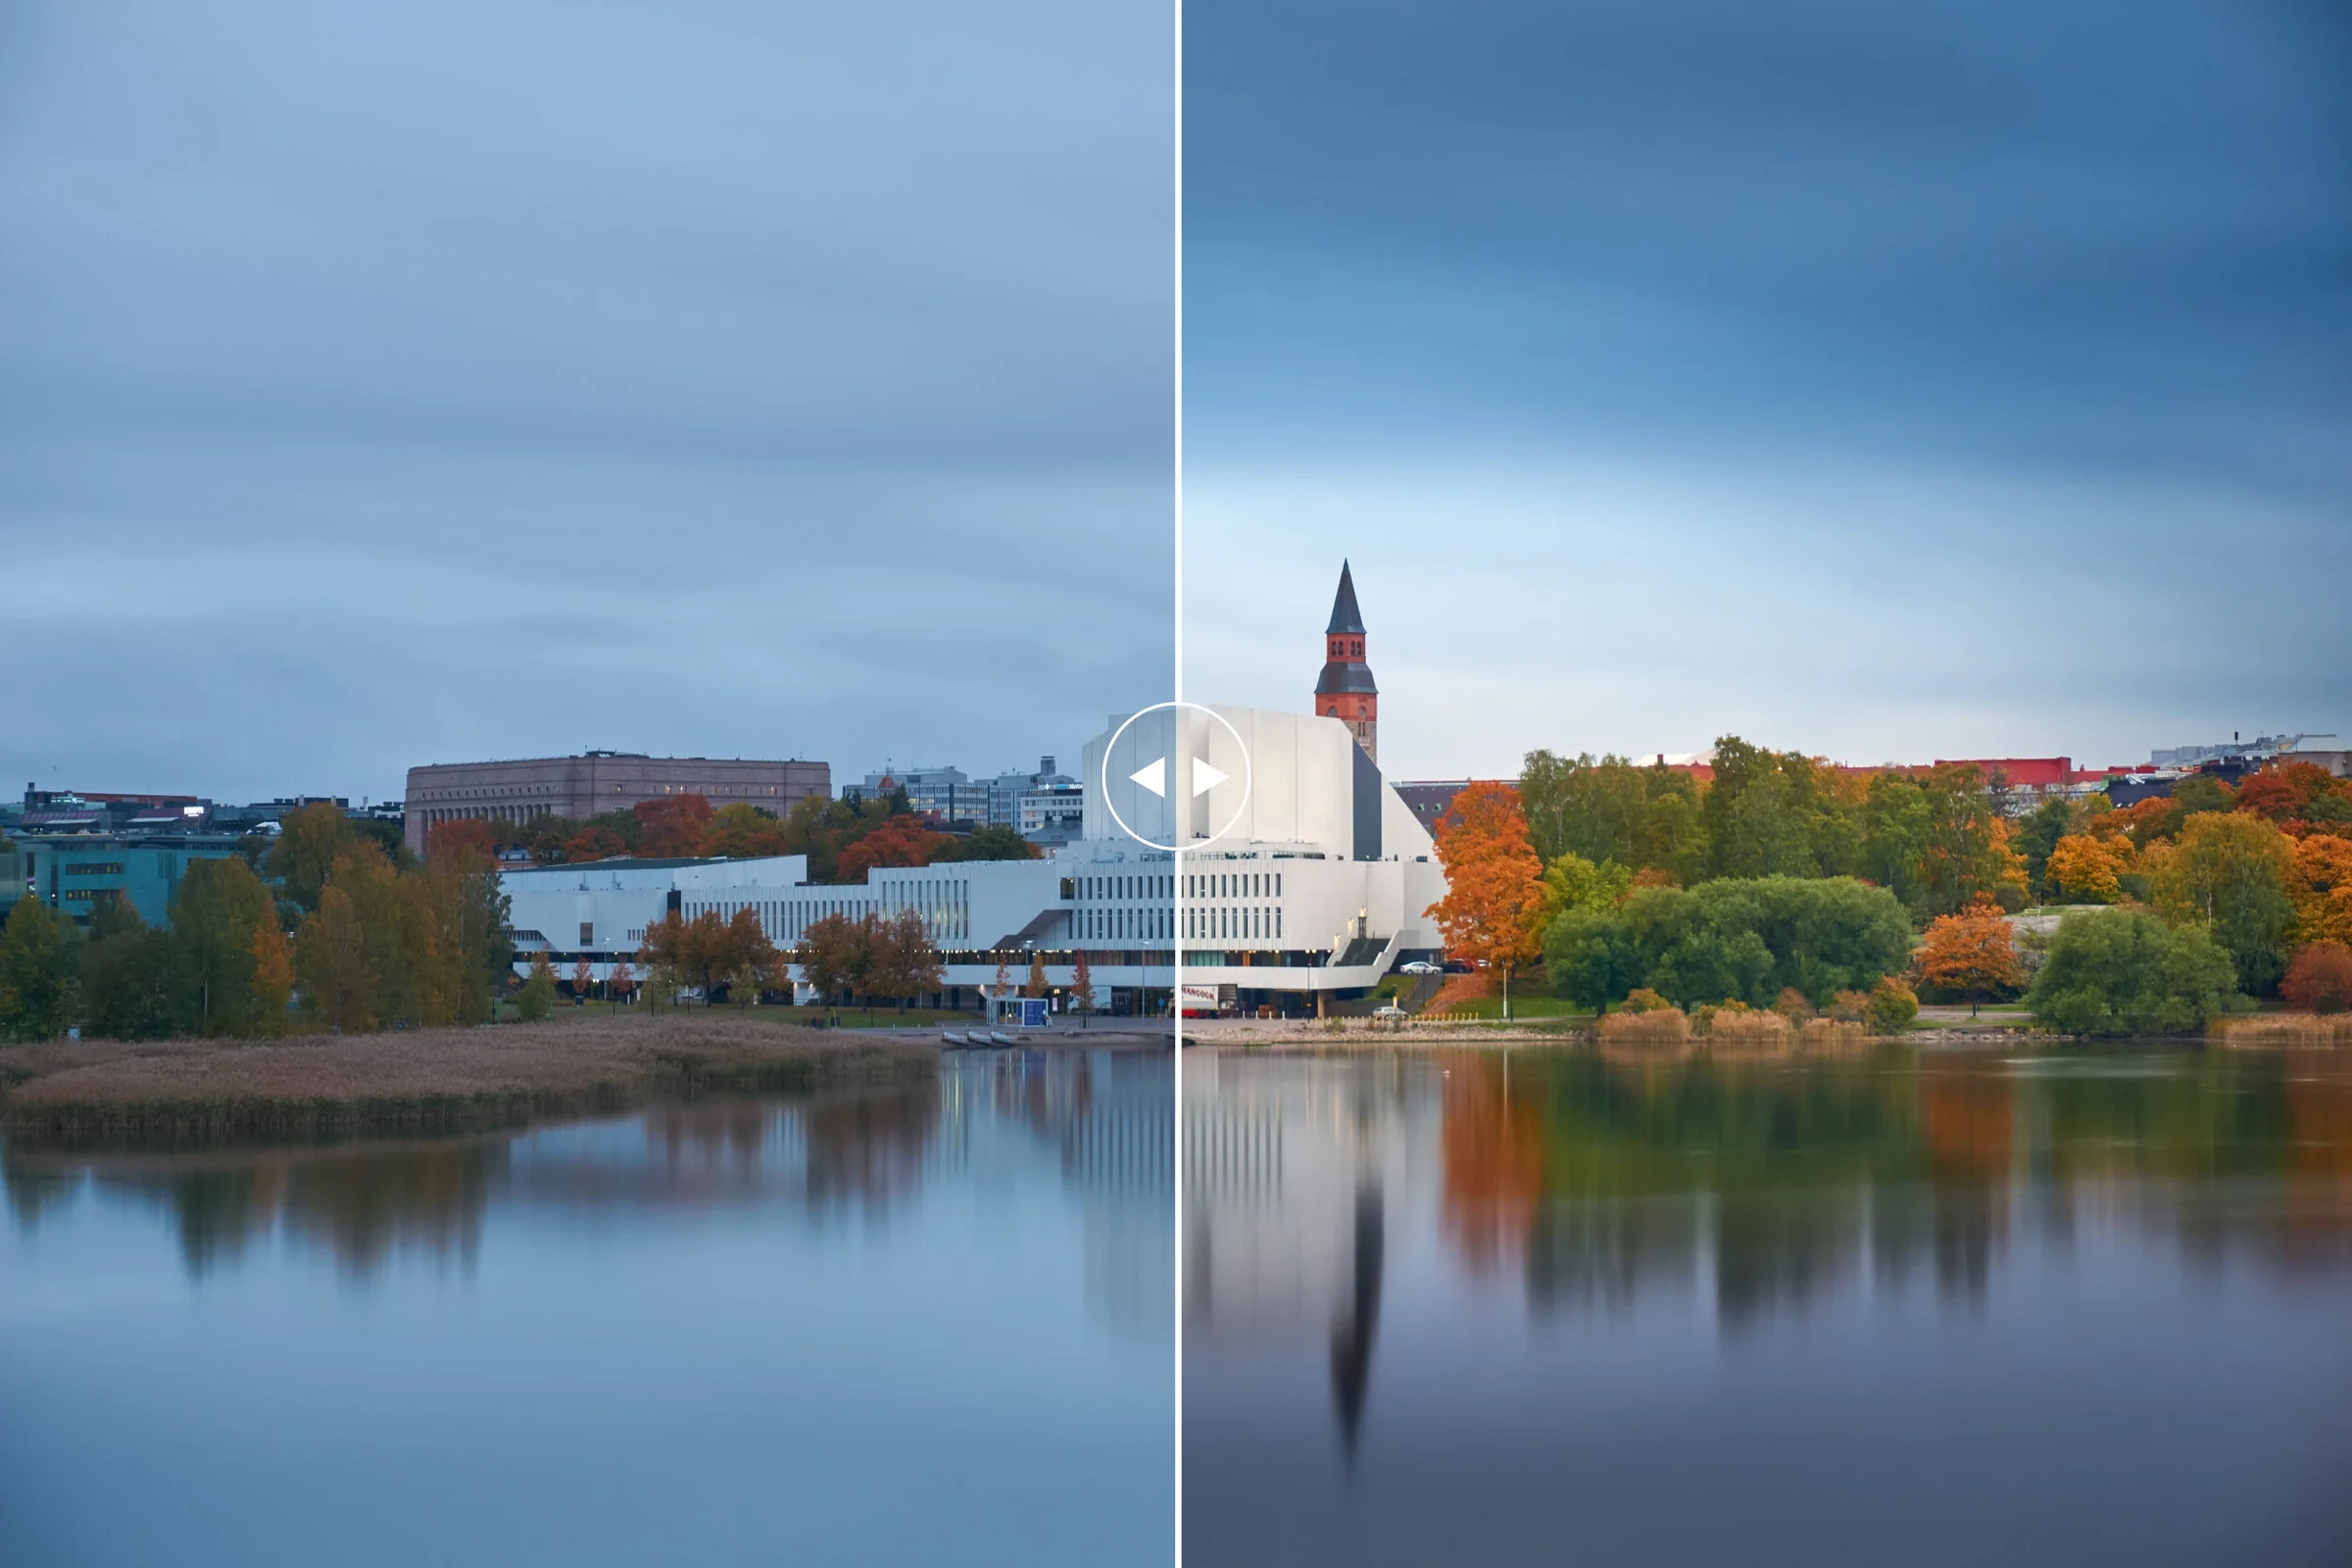
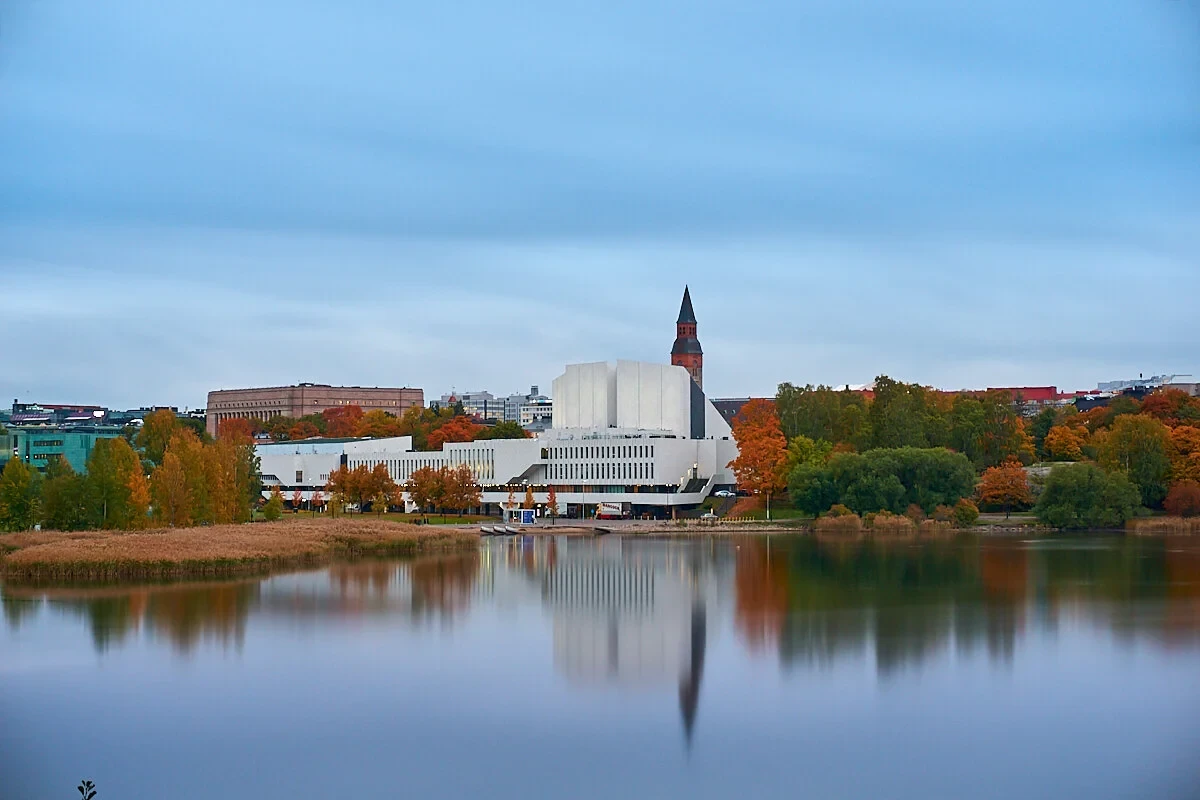
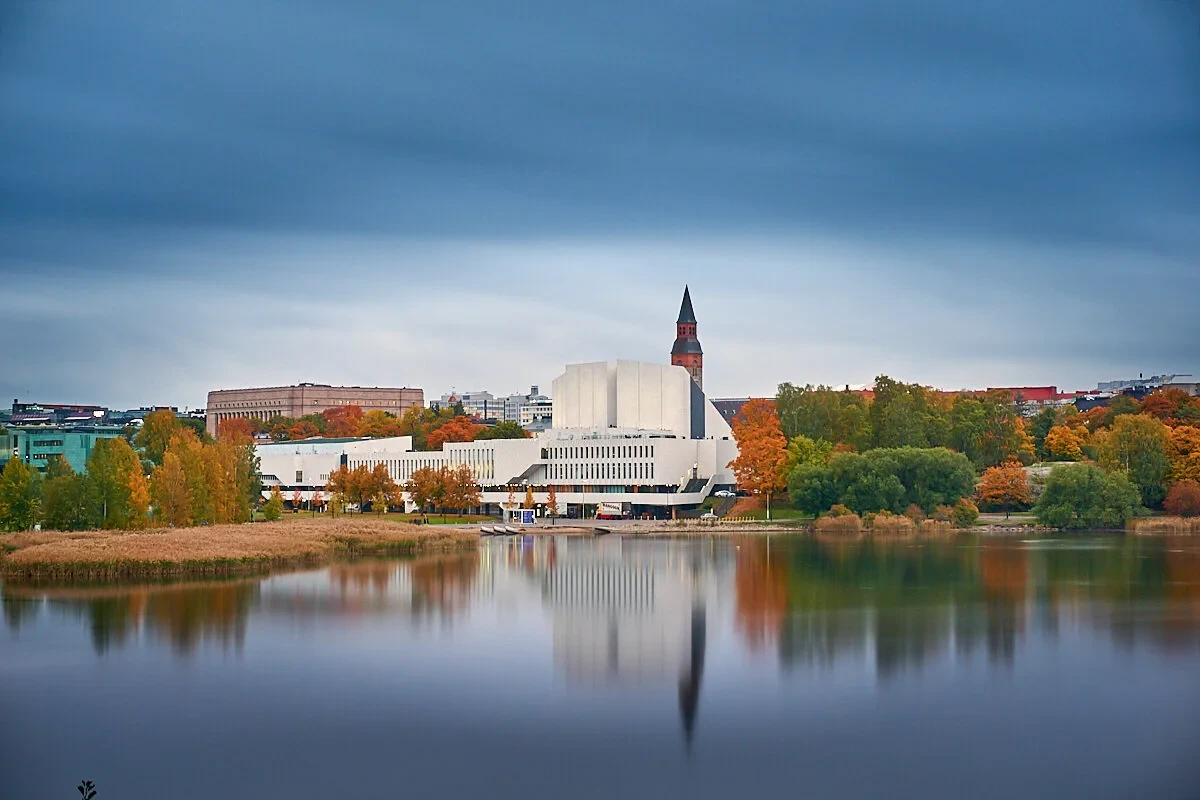
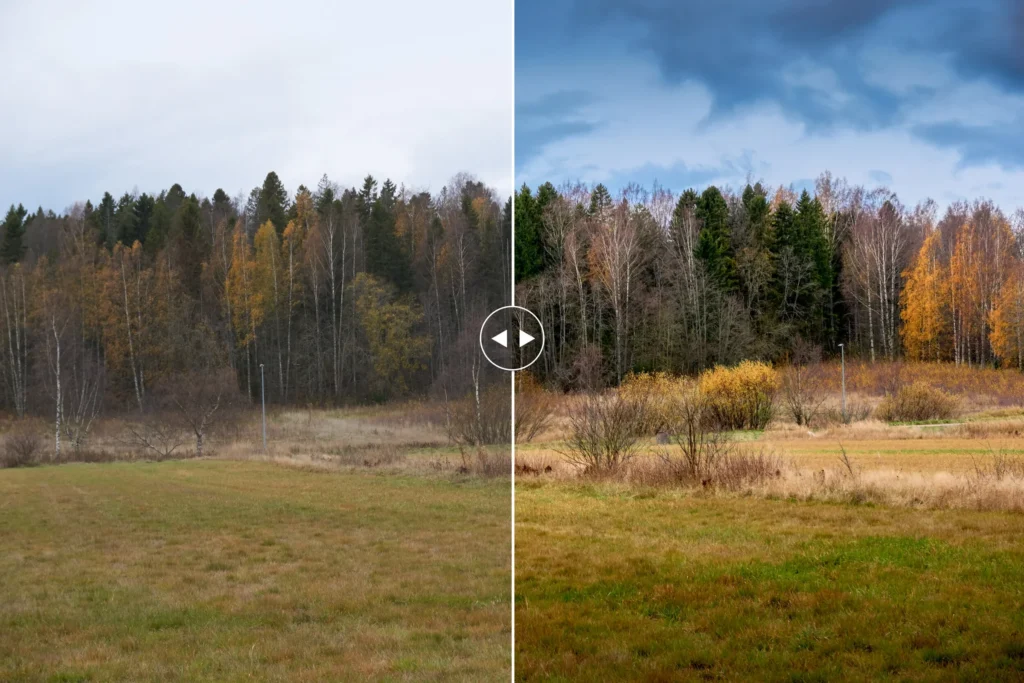
Here is the before and after adding the custom vignette and spotlight
If you enjoyed this post, kindly like and share it. Also, remember to subscribe to my newsletter to stay updated with the latest tips and news.
Written and photographed by Samir Zarrouk.
About me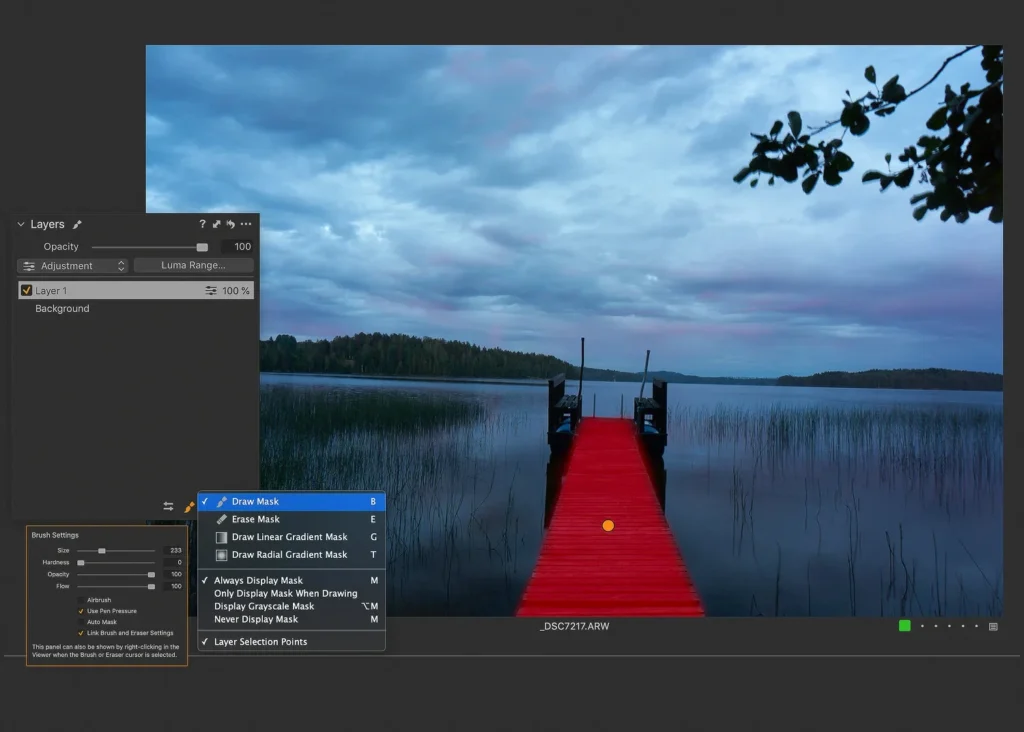


Questions & thoughts.
Something you’d like to ask, or a technique that worked for you? Share it below.