
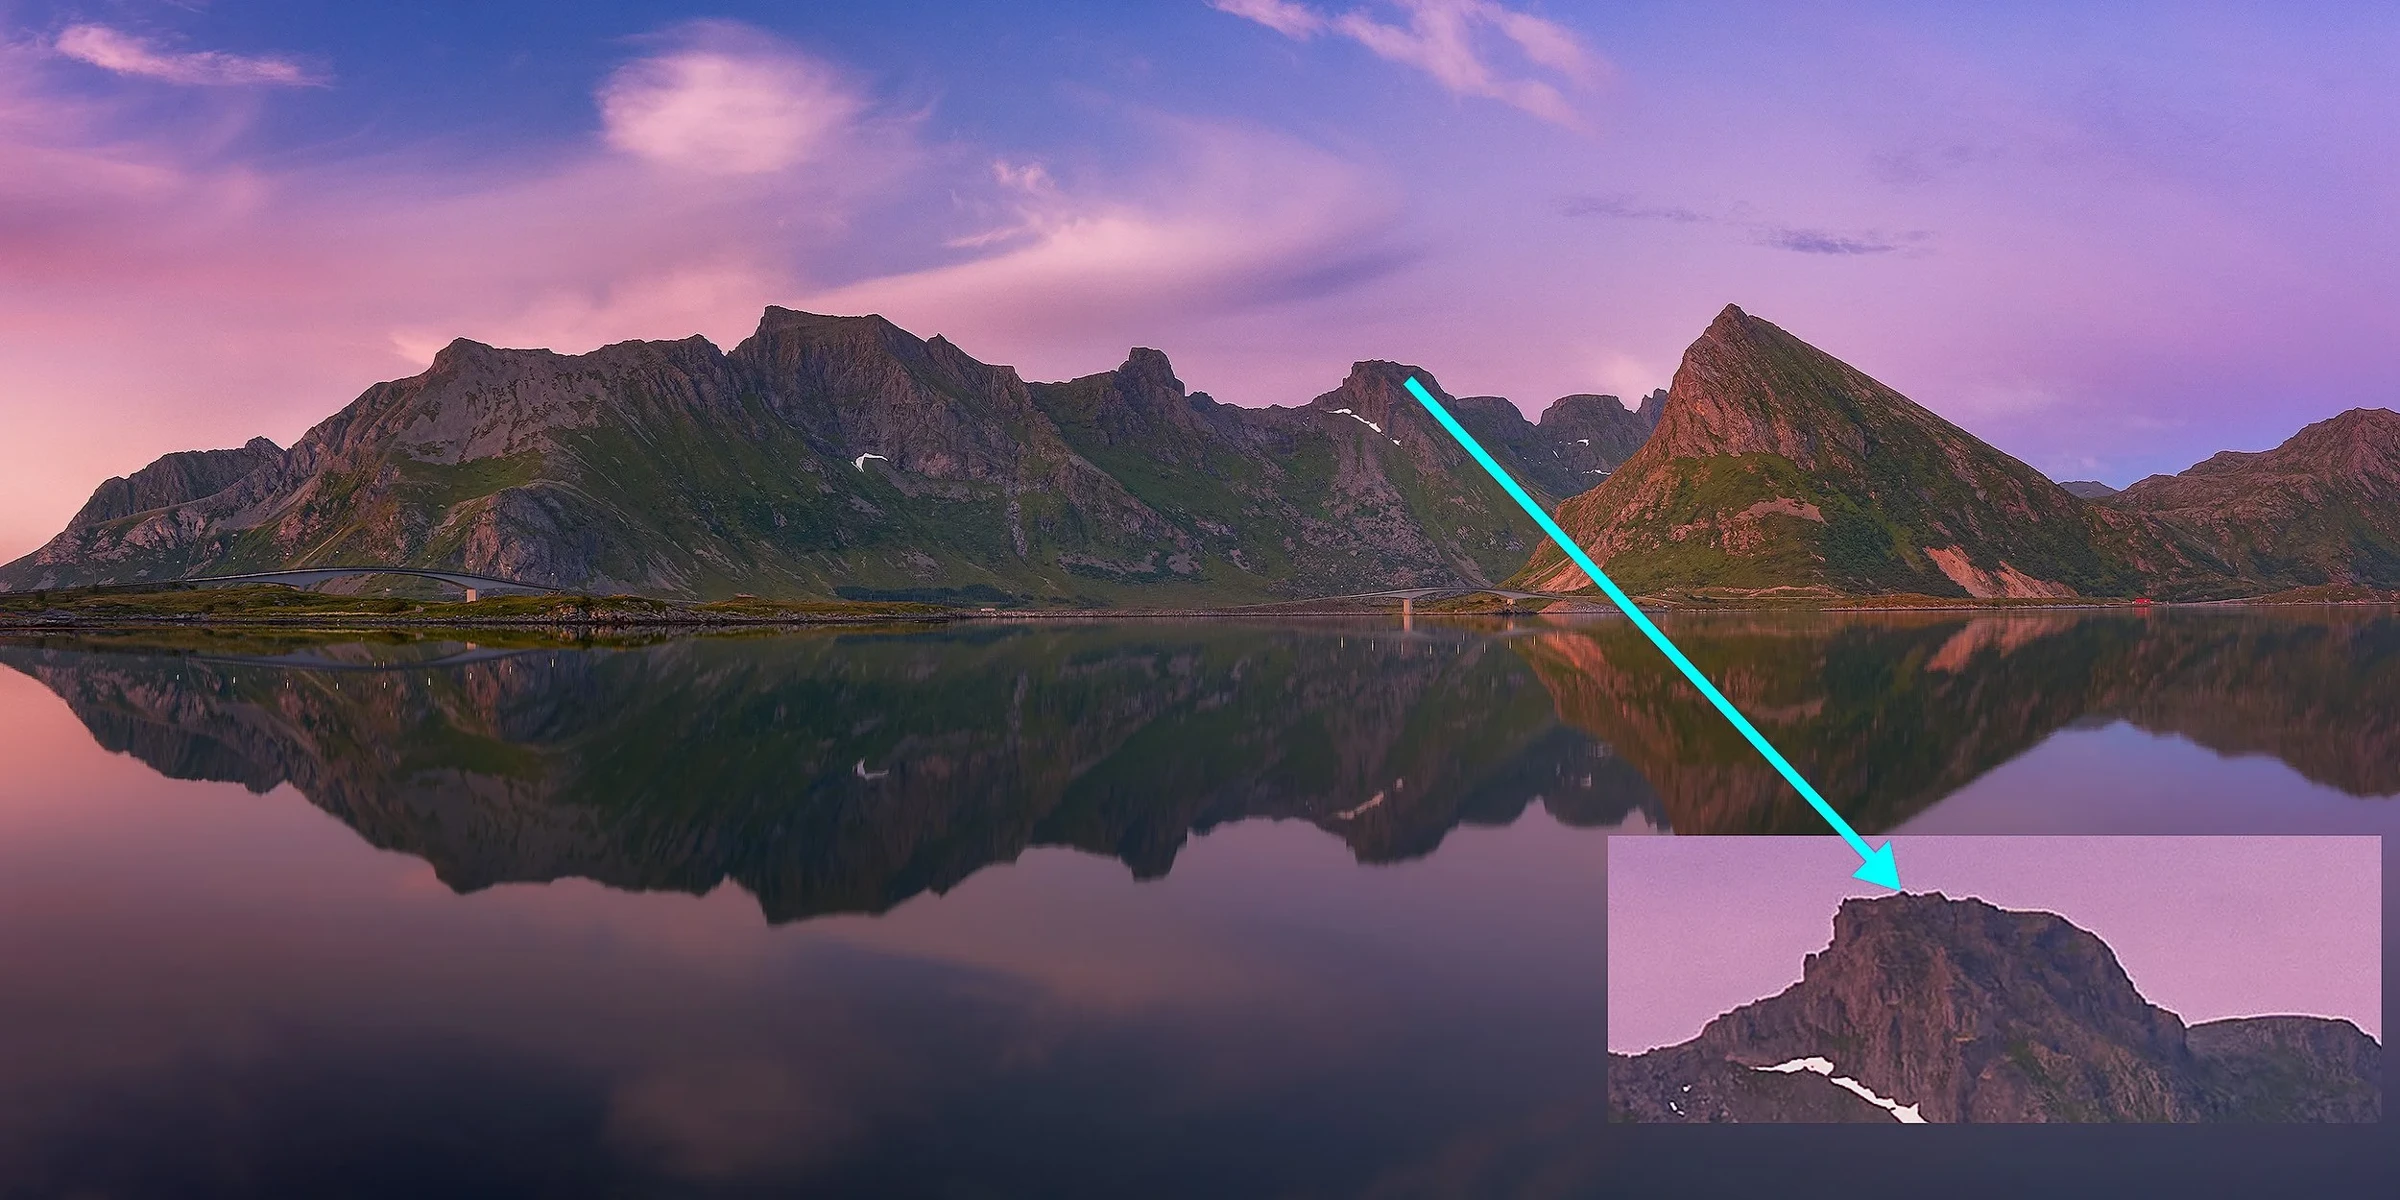
Processing images in Lightroom, Photoshop, or any editing software, we try to improve contrast, sharpness, and brightness. when making any of those adjustments it may create some artifacts like halos around the edges. fortunately, we can remove halos very quickly in Photoshop using a combination of blending modes and cloning, following those steps below.
-
Create a Merge visible layer
duplicate the background layer if you don’t have any other layers on the layers panel with the keyboard shortcut (cmd + J) on a mac or (ctrl + J) in windows. Or create a stamp visible layer if you already have some layers on the layers panel, using the keyboard shortcut (cmd + opt + shift + E) or (ctrl + opt + shift + E) on windows.
2. Rename and change the blending mode
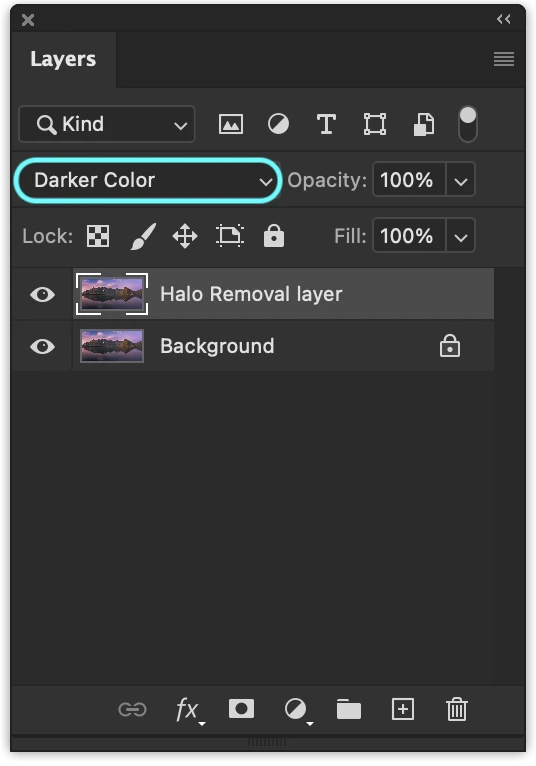
Photoshop Layers panel
double click on the new layer we made to rename it to something like a halo removal layer then change the blending mode to DARKER COLOR. this blending mode will make it easy to target only the white pixels without affecting the darker pixels
3. Removing the white Halos.
Select the clone stamp tool from the toolbar or use the keyboard shortcut (S), Make the brush a bit bigger than the helos.
-
With the clone stamp tool selected, position the cursor over an area in the sky close that has similar color and tone to clone from, then (Option-click) Mac or (Alt-click) Windows to define the clone source.
-
Position the cursor over the area that has helos then start painting. Note the cross-hair (cloning source) while you’re painting, the cross-hair follows the pixels you’re cloning. Take your time to go through the whole edges of the image to remove all white halos. resample as many times as you can to not leave a seam where cloned. keep your left hand on top of the alt/opt key to resample as you move from one area to another to make the cloning seamless.
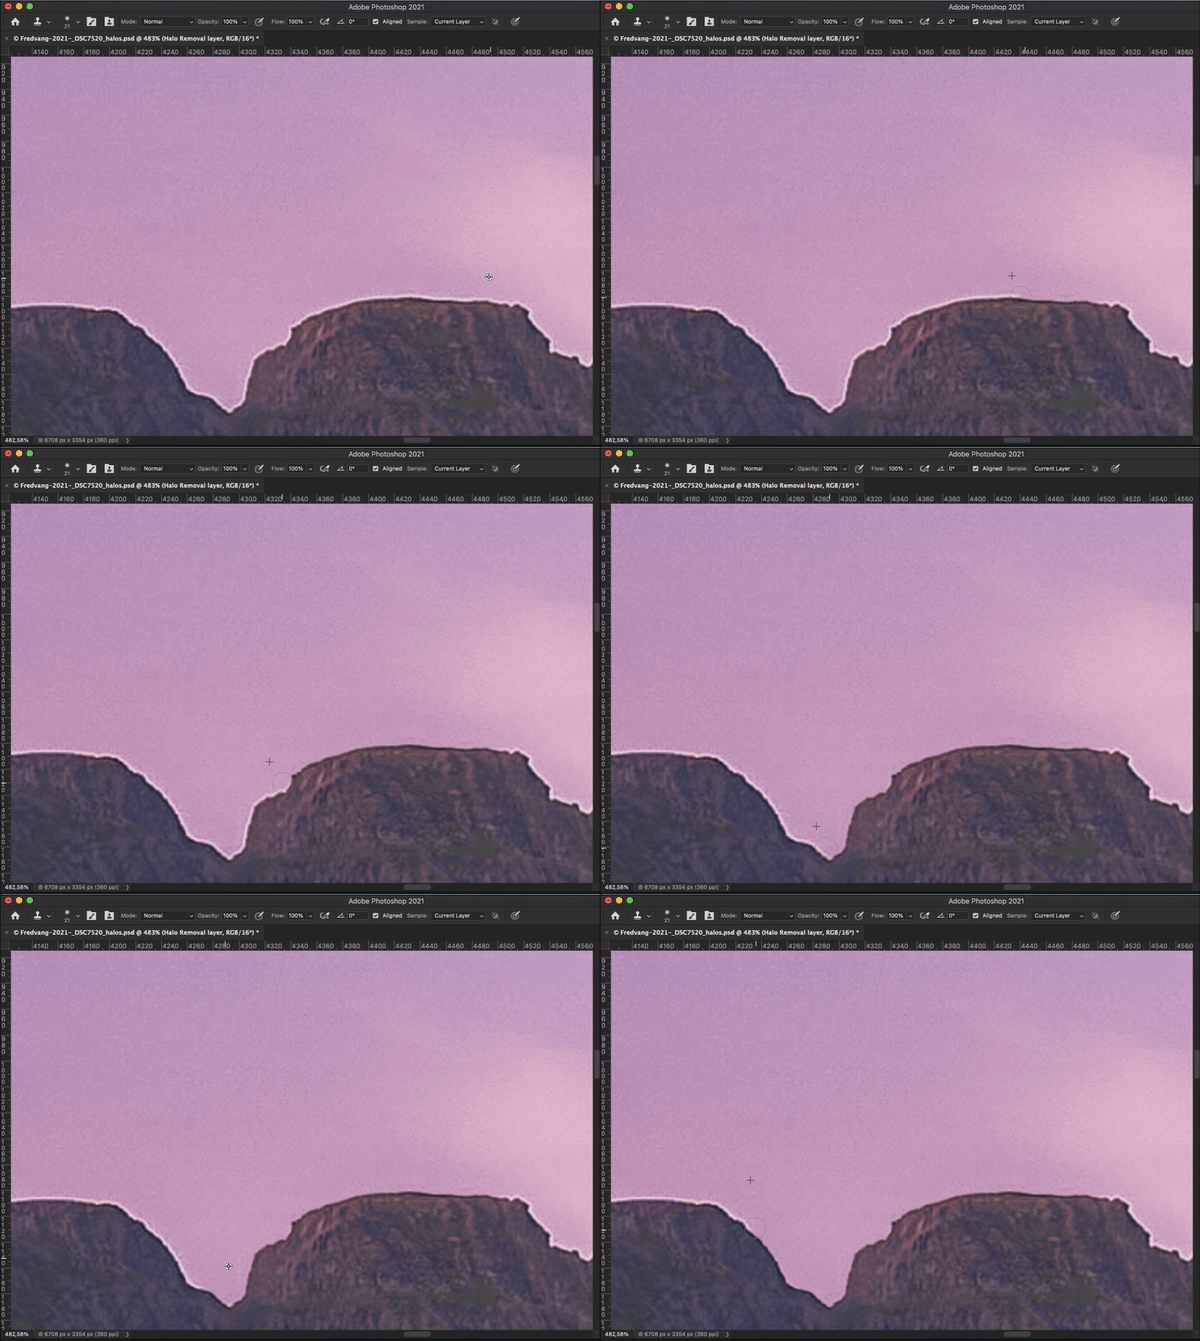
Painting with clone stamp tool over the white halos
That’s it! No wait we still can improve it!
4. Cleaning Up
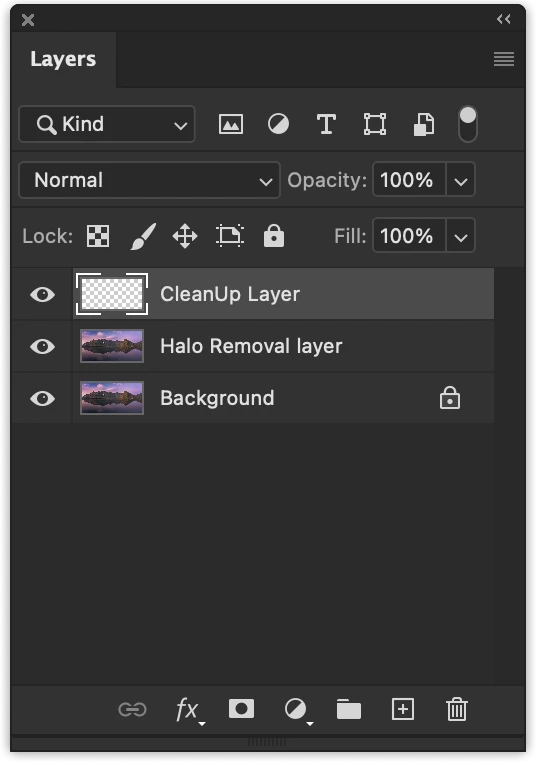
Photoshop Layers panel
After finishing removing all the helos with the clone stamp tool, we may need to clean up some of the leftovers as the cloning may not be perfect.
Create a new empty layer, Rename it cleanup Layer, select the Healing Brush tool and once again scan through the images to clean any leftovers from the cloning tool we used earlier with the healing brush tool, just pain over any artifacts and Photoshop will remove it automatically.
5. Removing the Dark Halos.
Totally optional step. if you see a dark line around your subject, like what you can see from this image, on the mountains, there is a dark line around the edges from the inner side.
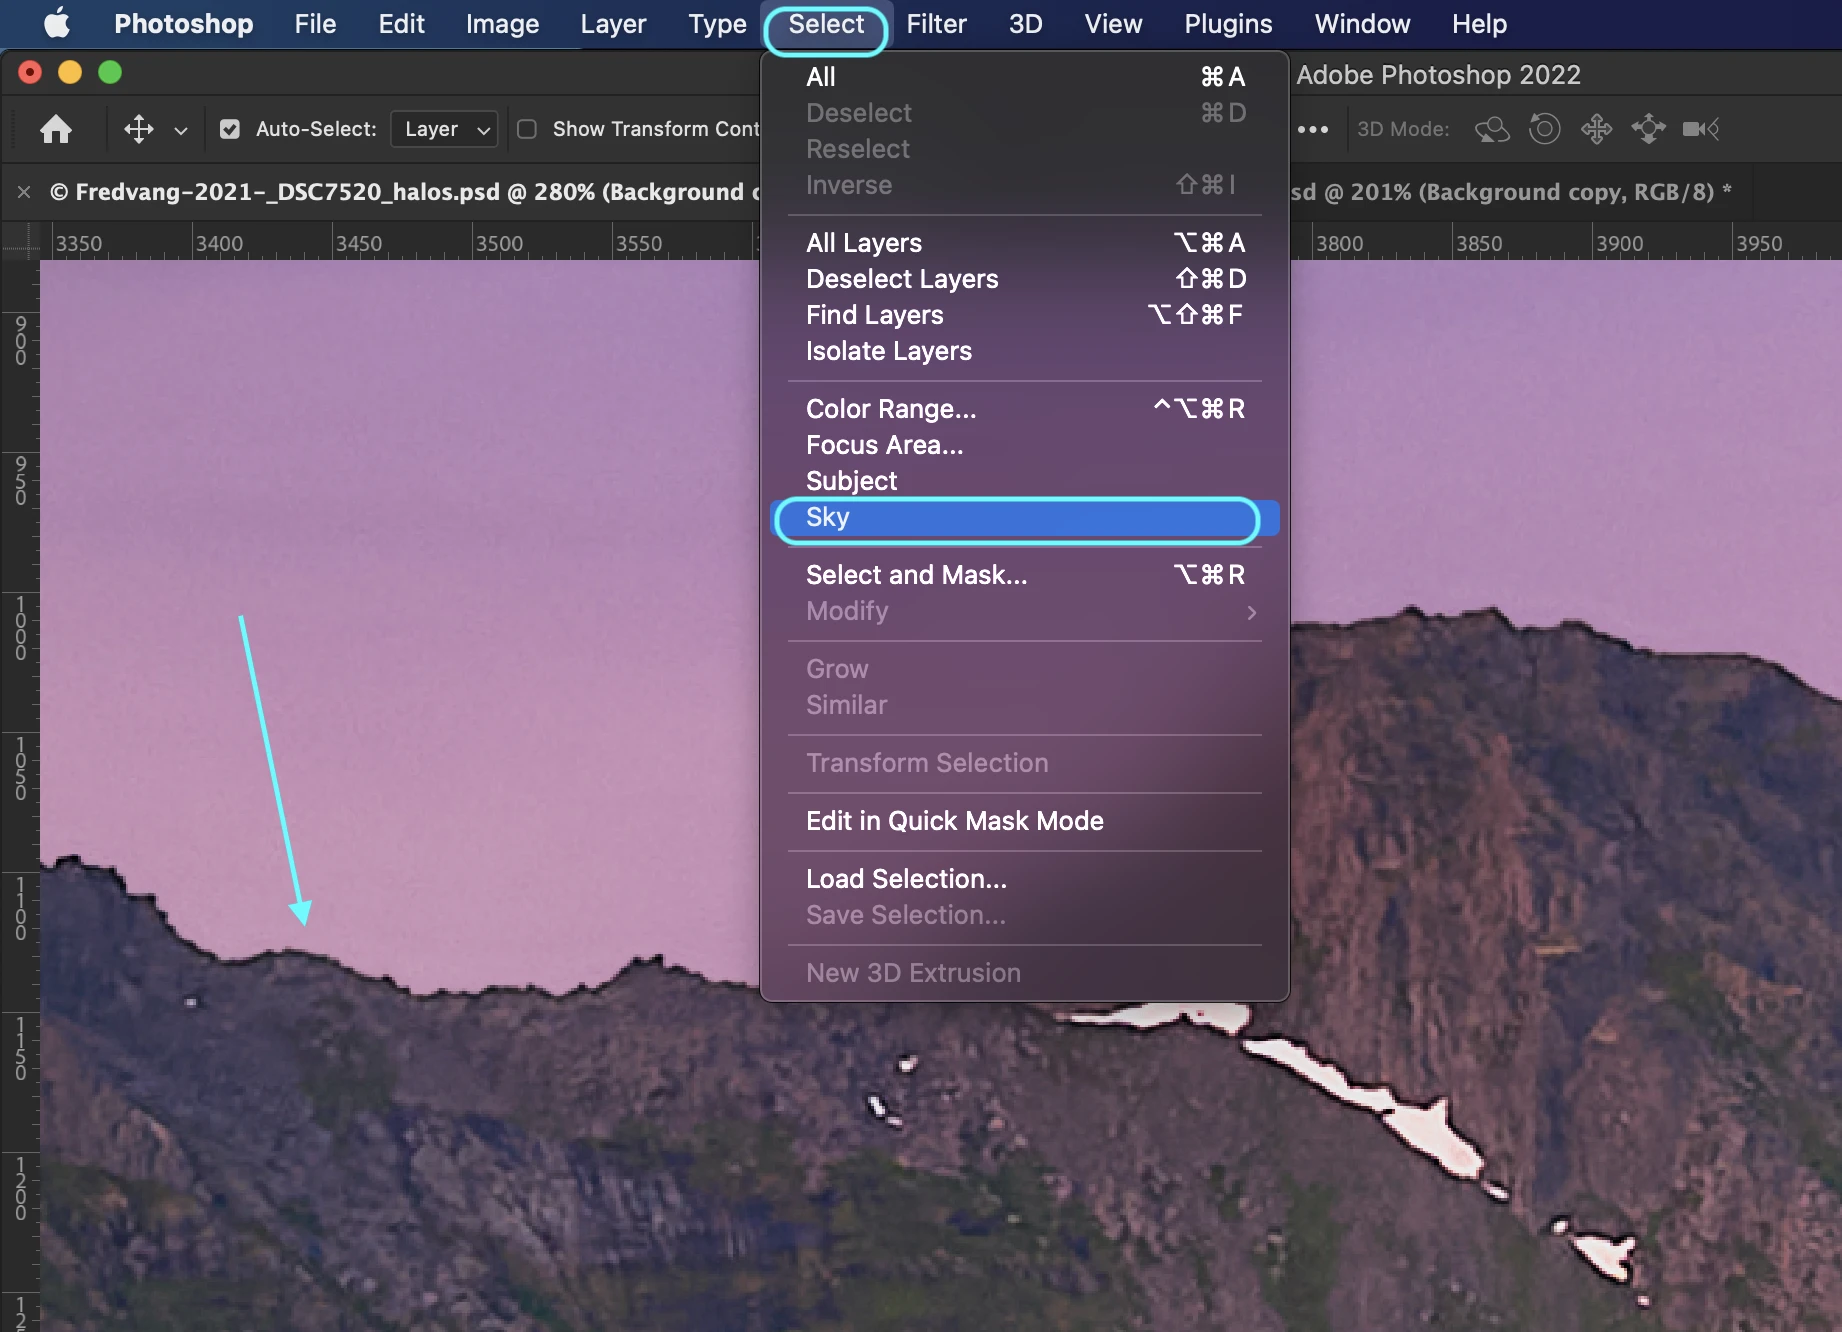
black halos, and how to make a selection of the sky using select sky
To remove this dark halo, we need to make a selection first then use the clone stamp tool to remove the halos. there are many ways in Photoshop to make selections, I normally prefer to use luminosity masks, but in this tutorial to keep it simple and not too long.
-
in the select menu choose select sky, it does a pretty good job most of the time.
-
invert the selection so we have the mountains selected not the sky. from the select menu choose inverse the selection or use the keyboard shortcut (cmd + shift + I) on mac or (ctrl + shift + I) on windows.
-
with the clone stamp tool selected sample an area close to the dark line to clone from, using the Alt/Opt key resample as many times as necessary to make it seamless cloning.
I prefer to do this dark halo removal in a new empty layer so at the end if I overdid it, I can use the Opacity slider to reduce it like 50% or so.
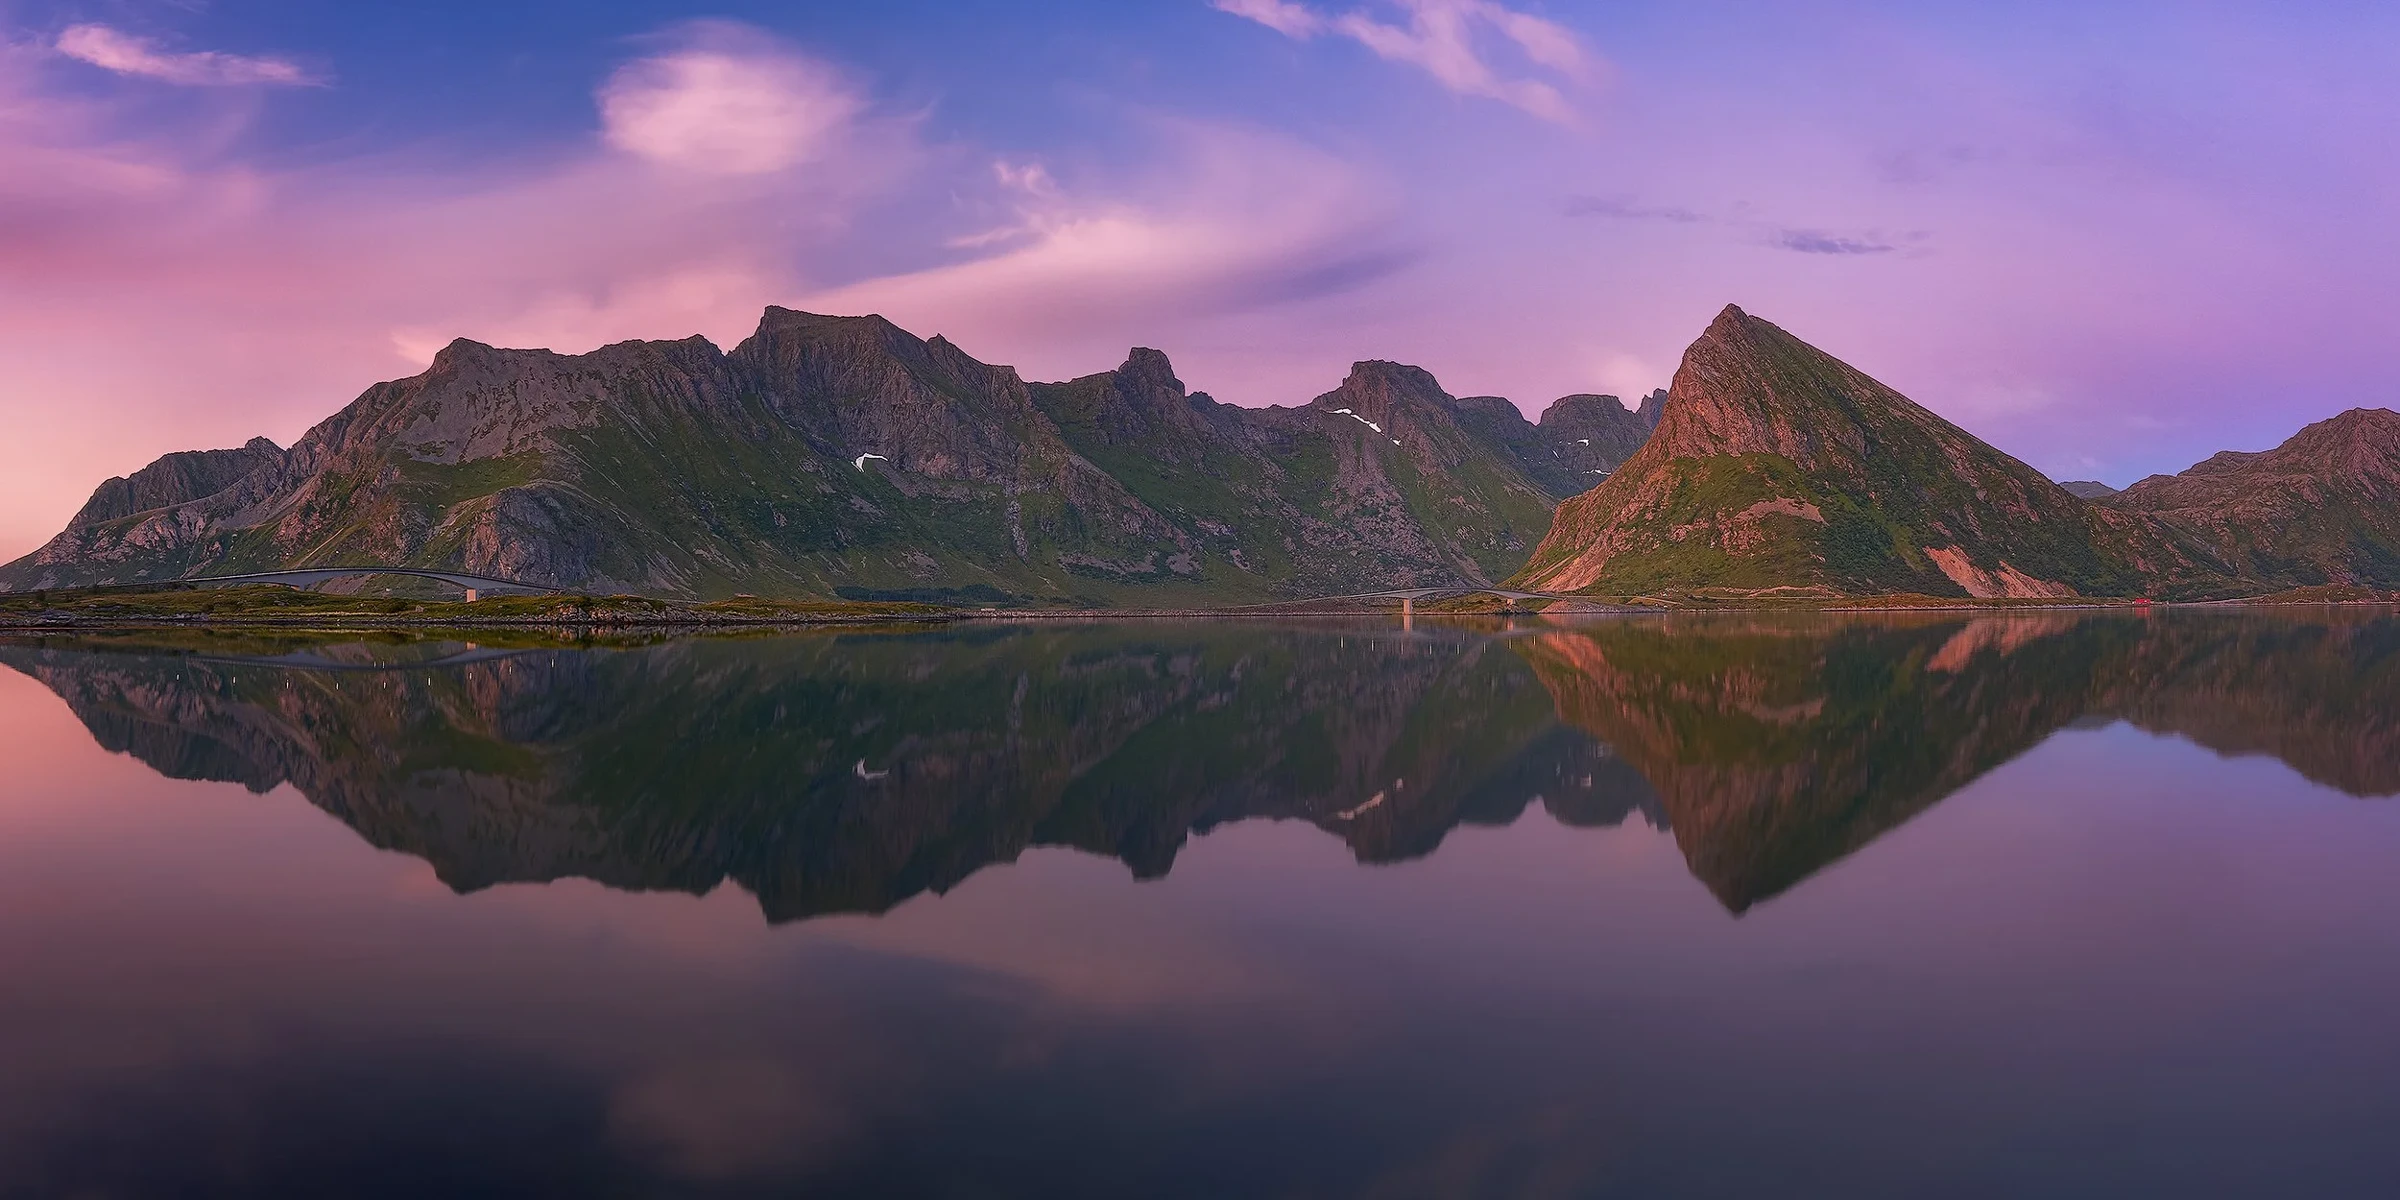
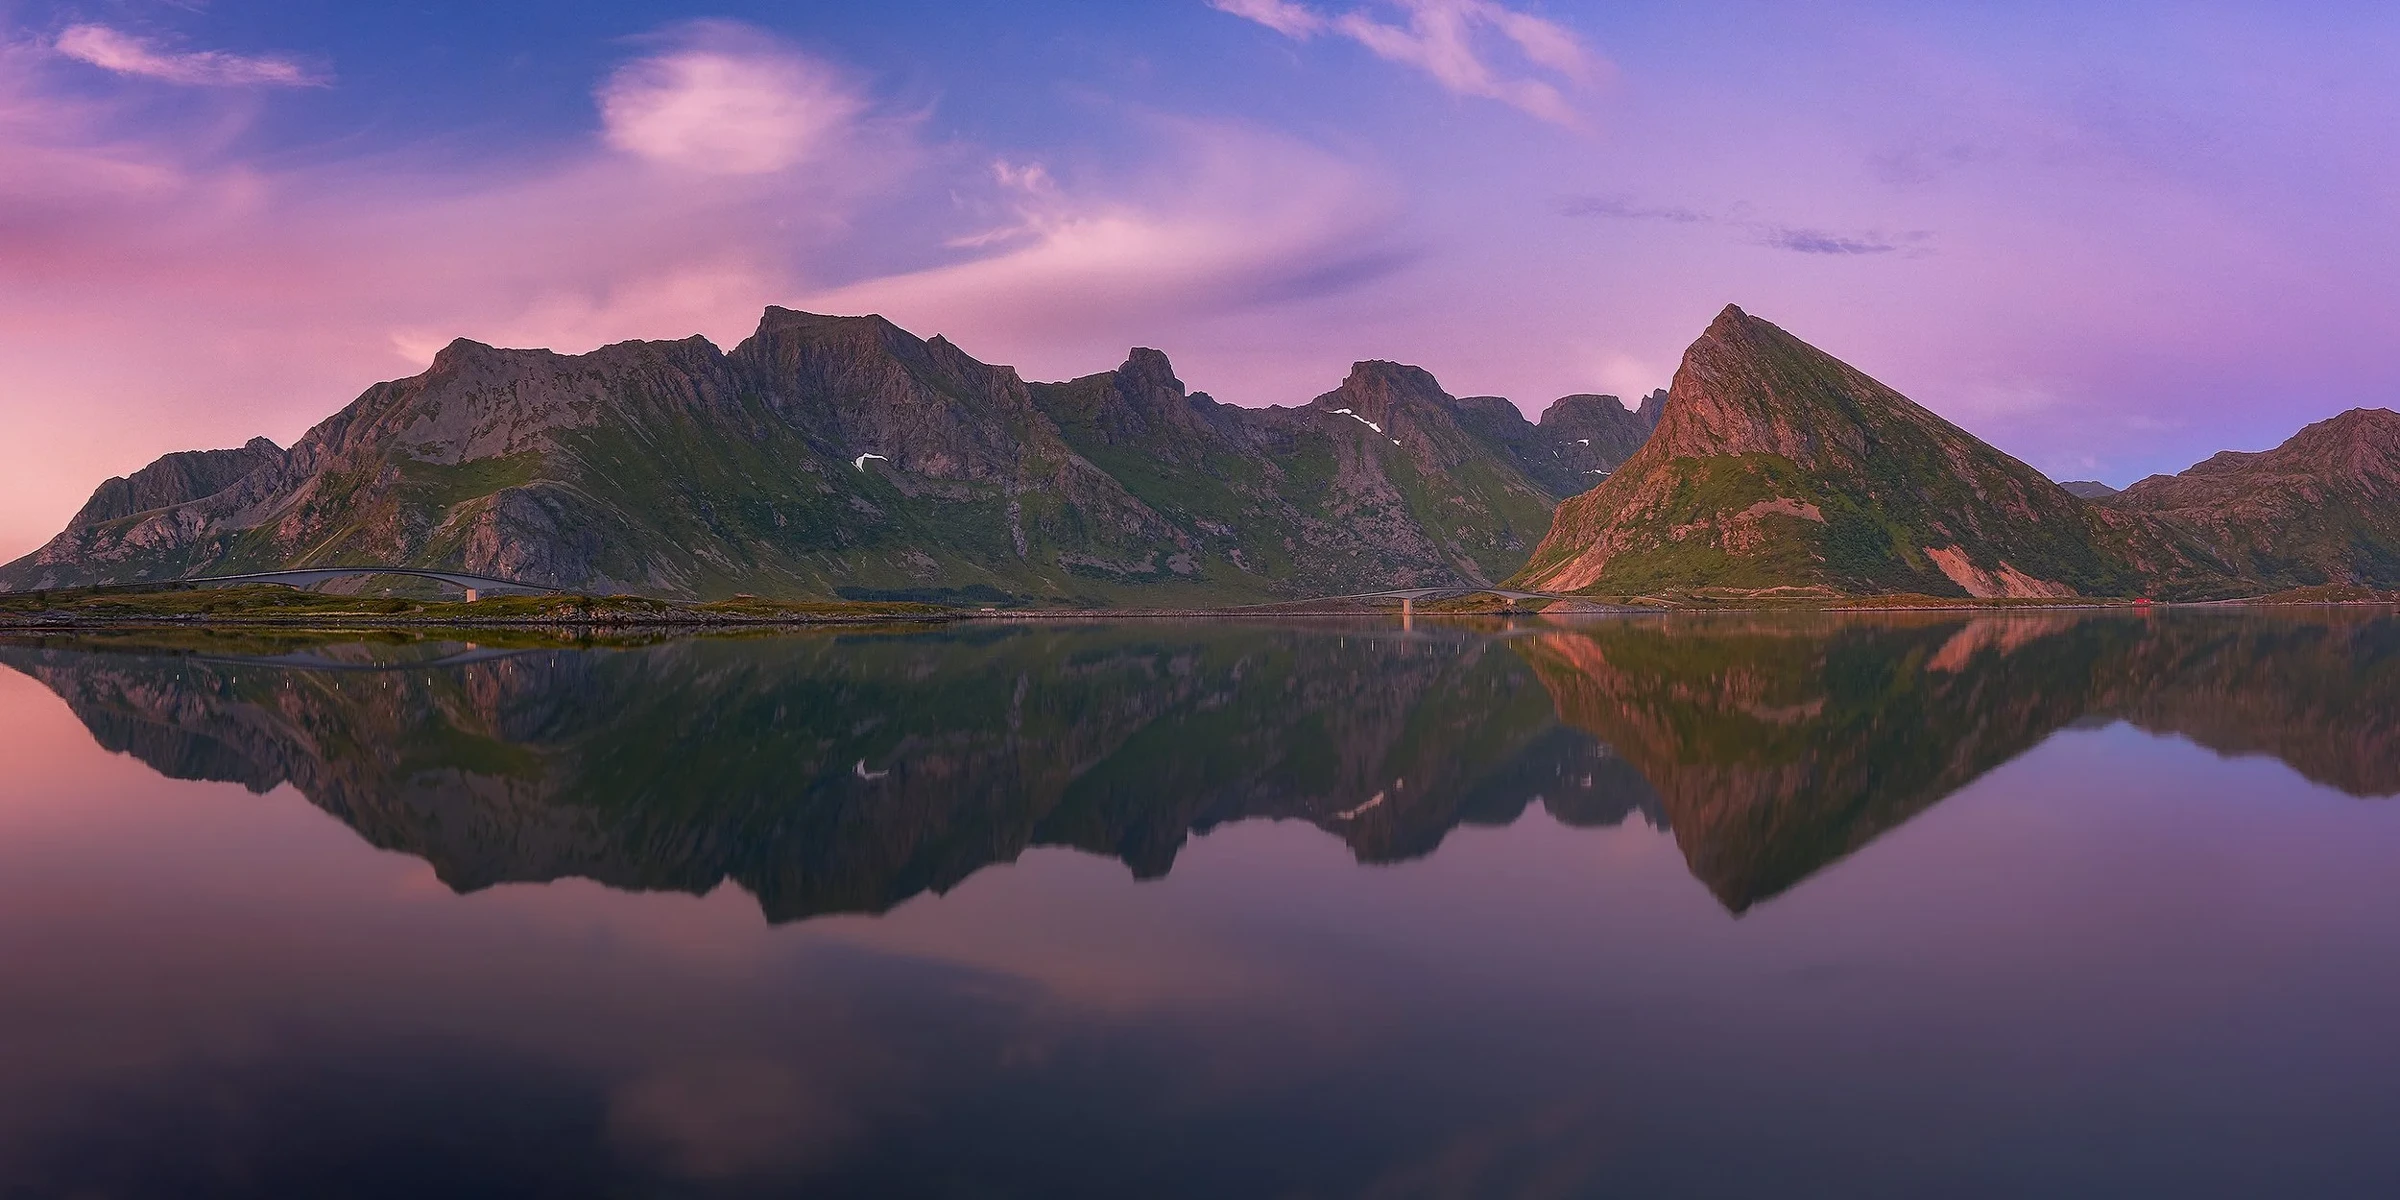
Here is a before and after removing helos. Click on the image to view at 100%
AUTOMATE THE PROCESS
Creating All those layers every time manually can be a pain, I recommend creating a Photoshop action to speed up the process. you can also download the action I made, or if you prefer using a script I provided one in the download folder as well. I like using scripts as I can assign any kind of keyboard shortcuts to them as well as they work faster and, can be super smart.
HALOS REMOVE PHOTOSHOP ACTION & SCRIPT
Enter your email address and click the button below to get the Photoshop action and script.
if you are already subscribed to my newsletter check your inbox for the download link.
If you enjoyed this post, kindly like and share it. Also, remember to subscribe to my newsletter to stay updated with the latest tips and news.
Written and photographed by Samir Zarrouk.
About me


Questions & thoughts.
Something you’d like to ask, or a technique that worked for you? Share it below.