
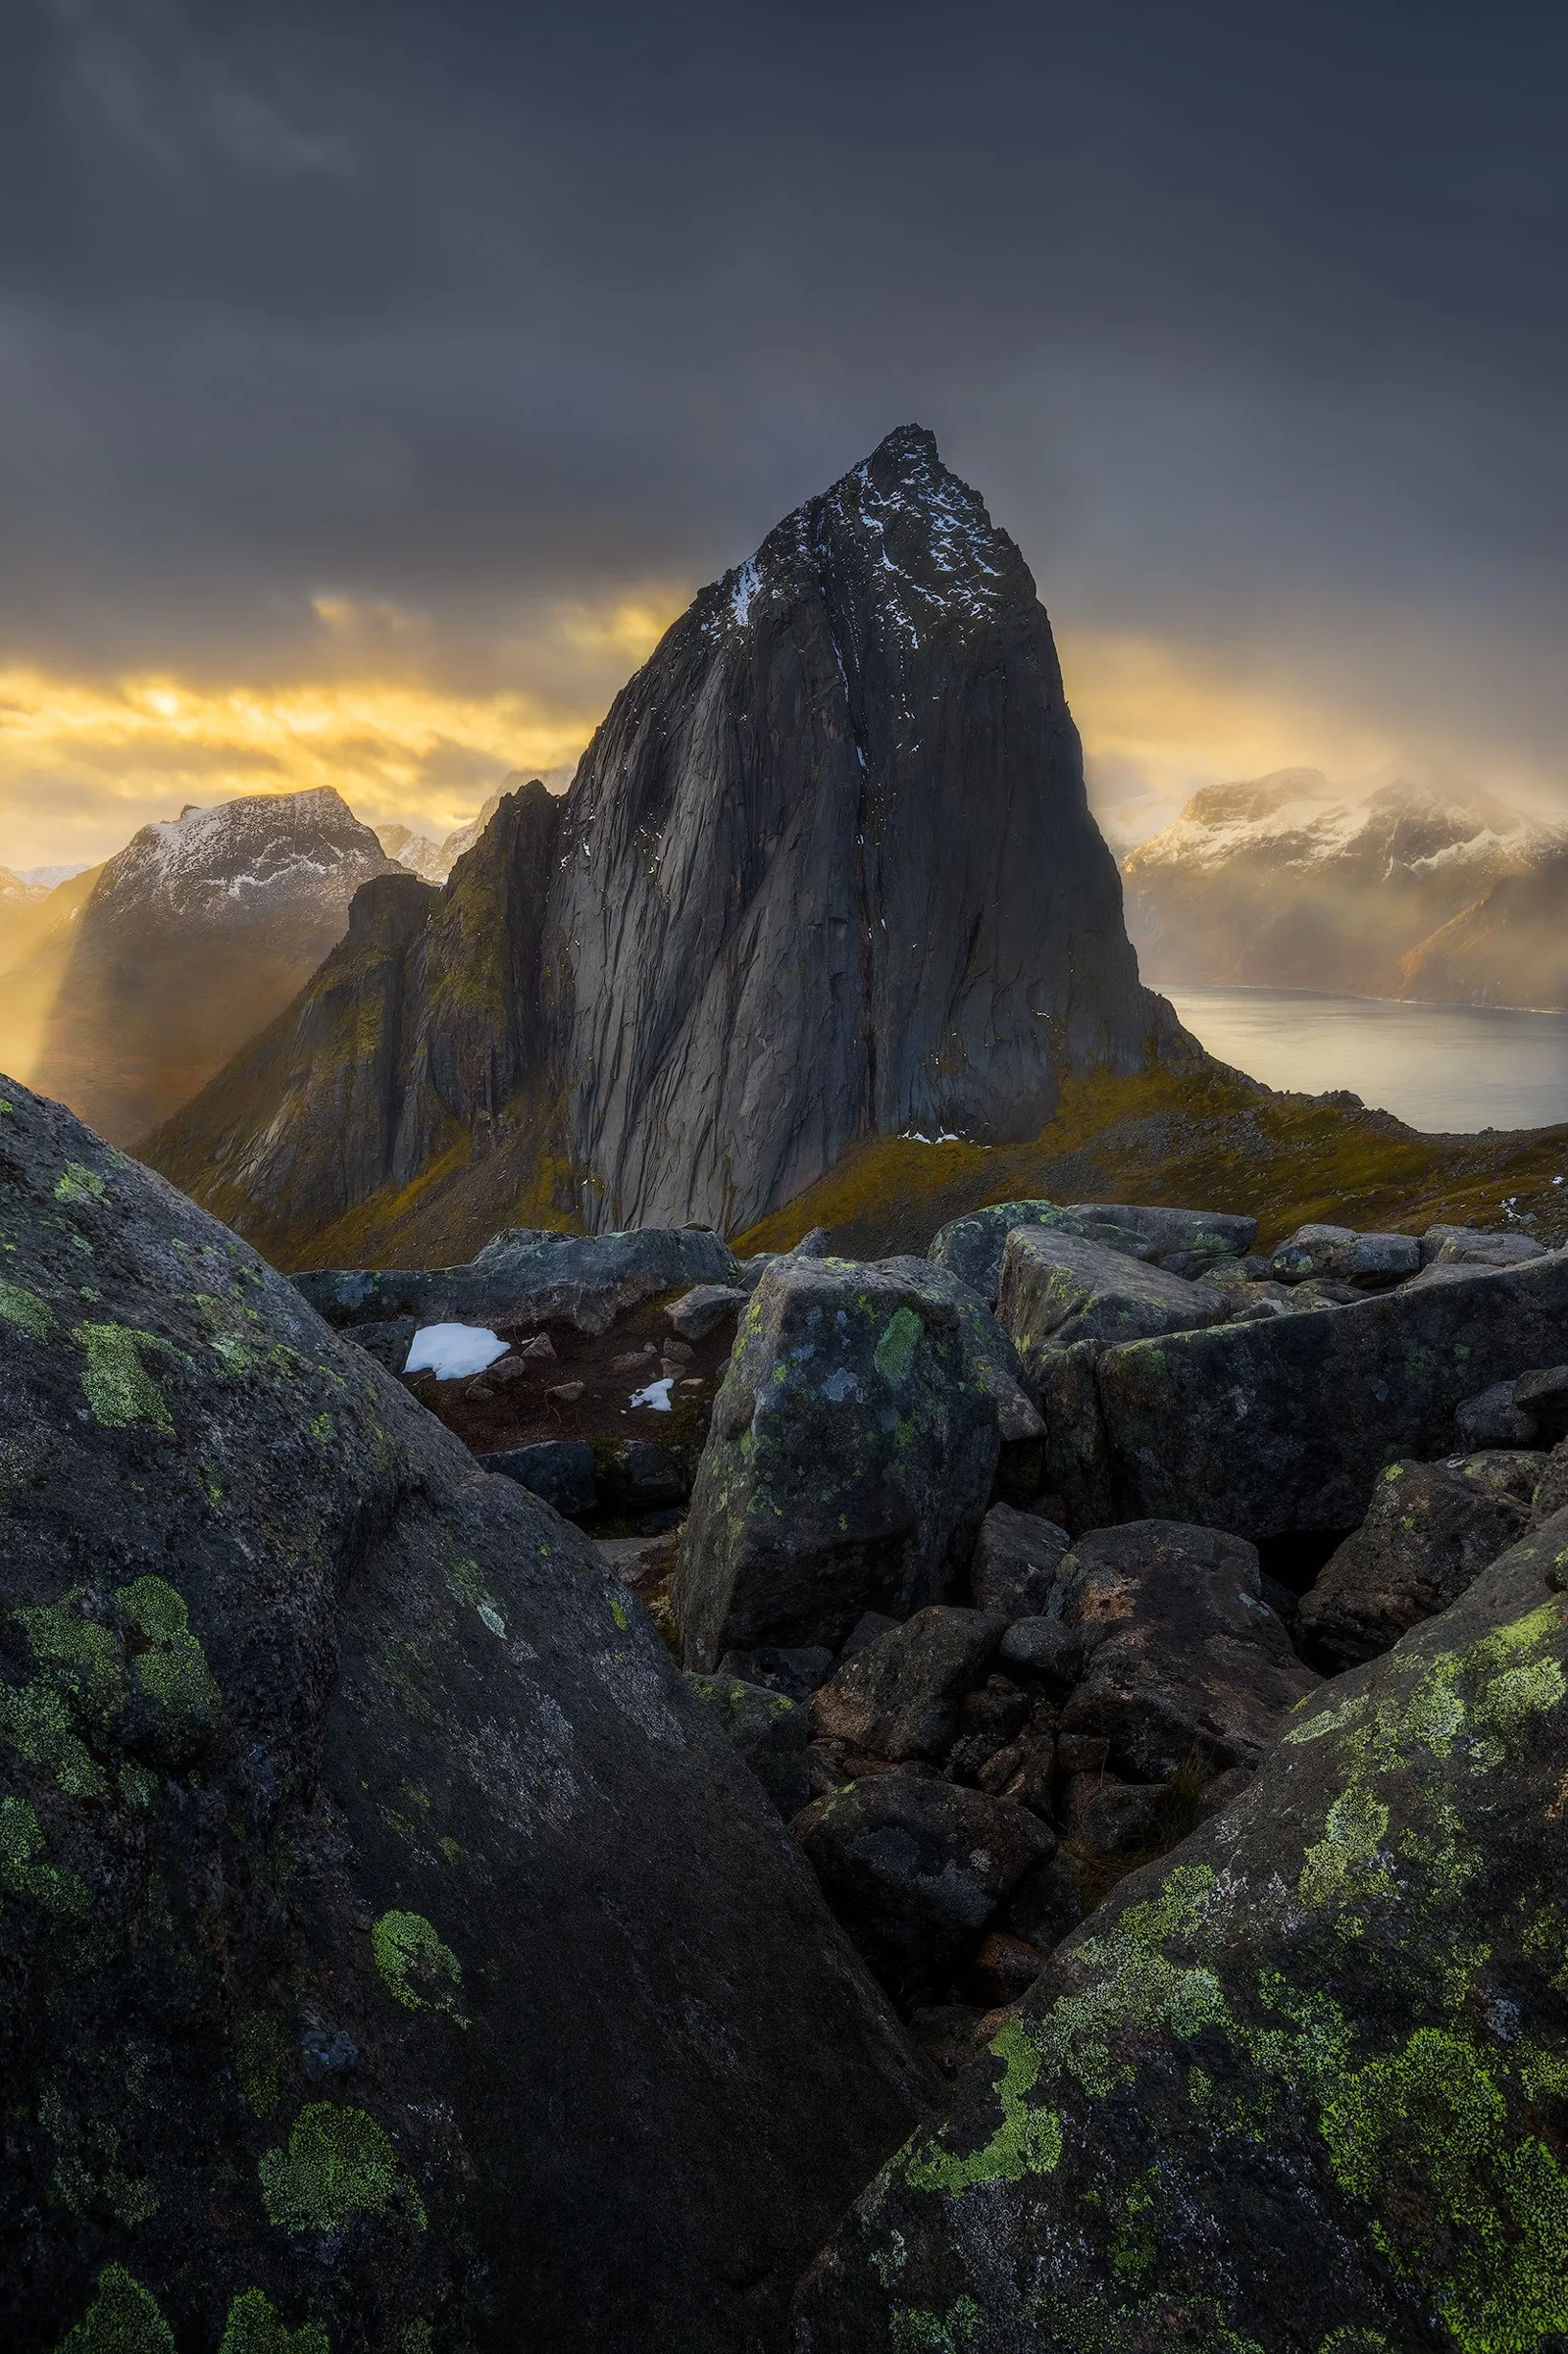
Photographing in the rain can be quite challenging, especially when it comes to keeping your camera lens clear of water spots. You might carefully wipe the front element, only to have new droplets appear mid-shot. While these spots can be hard to spot on a small LCD screen, they become painfully obvious on a larger display. Fortunately, with a few simple techniques in Photoshop, you can easily remove these distracting water spots from your favourite images without sacrificing detail.
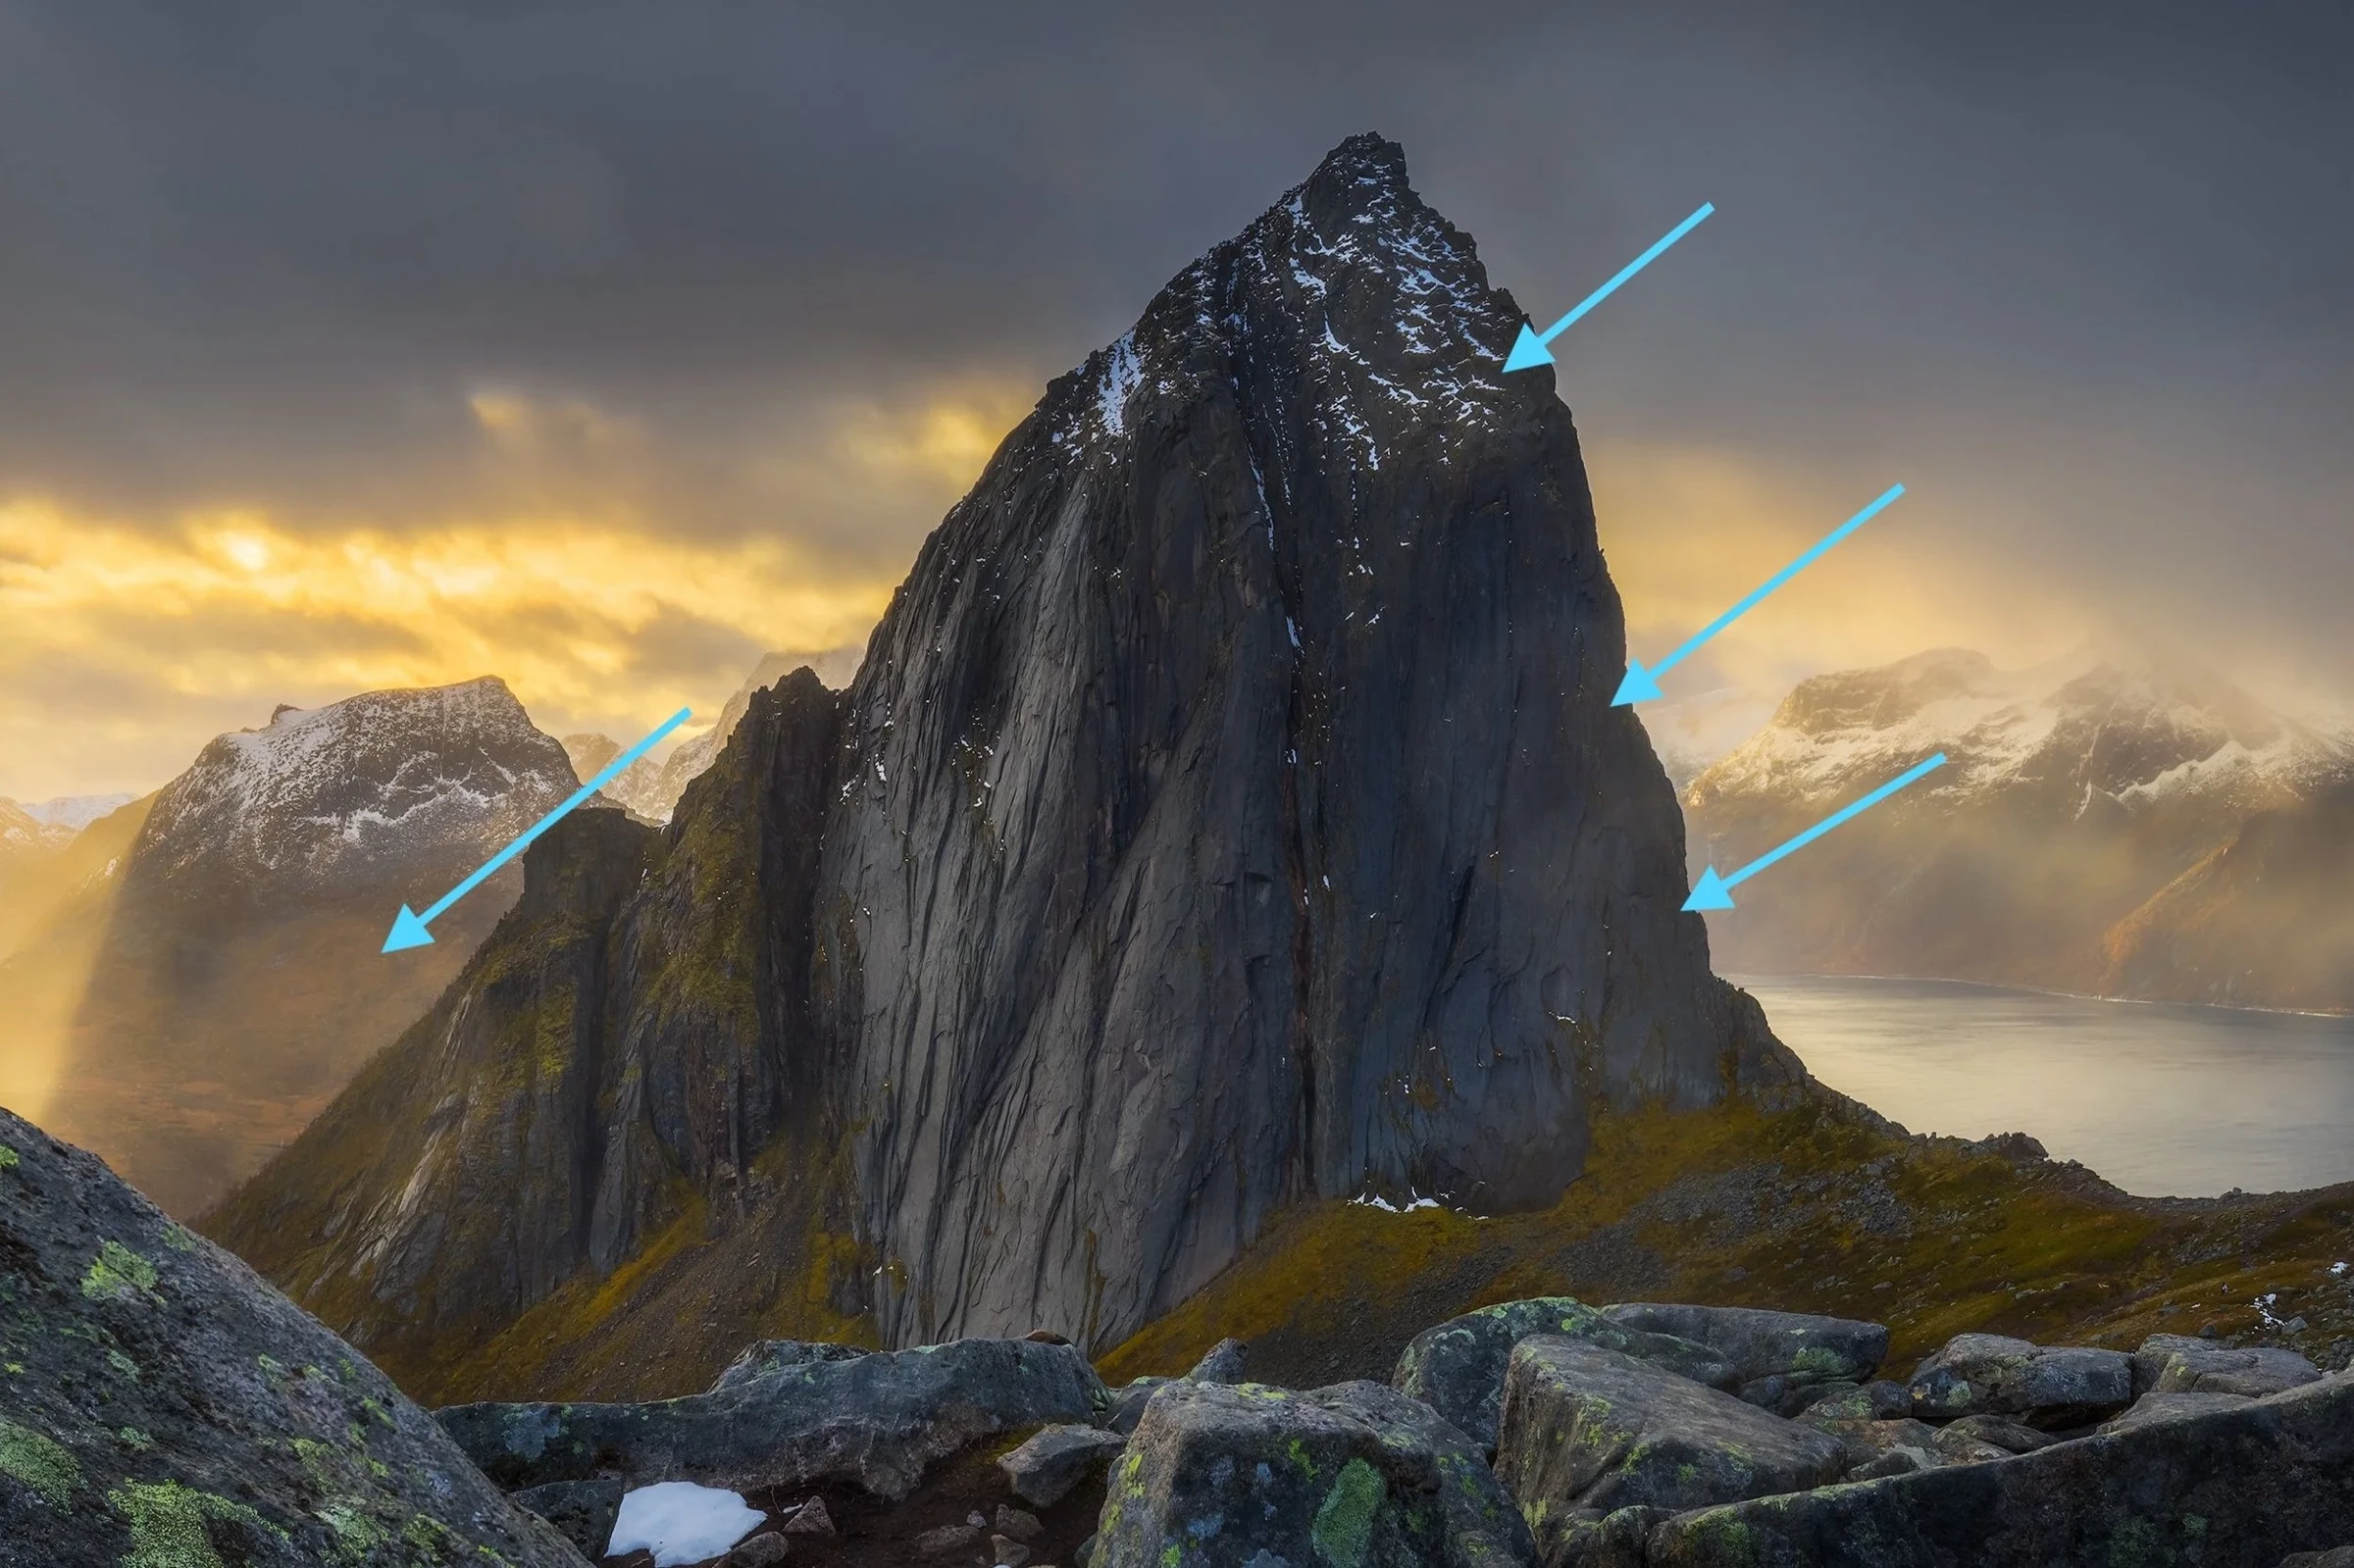
Water spots and flares typically display two key characteristics: they are brighter than the surrounding areas and often have a different color. To address these issues, we can follow a two-step approach. First, adjust the brightness to match the luminance of the spots with that of the surrounding areas. Then, correct any color discrepancies to ensure that the spots blend seamlessly into their environment.
Step 1: Create a new burn layer
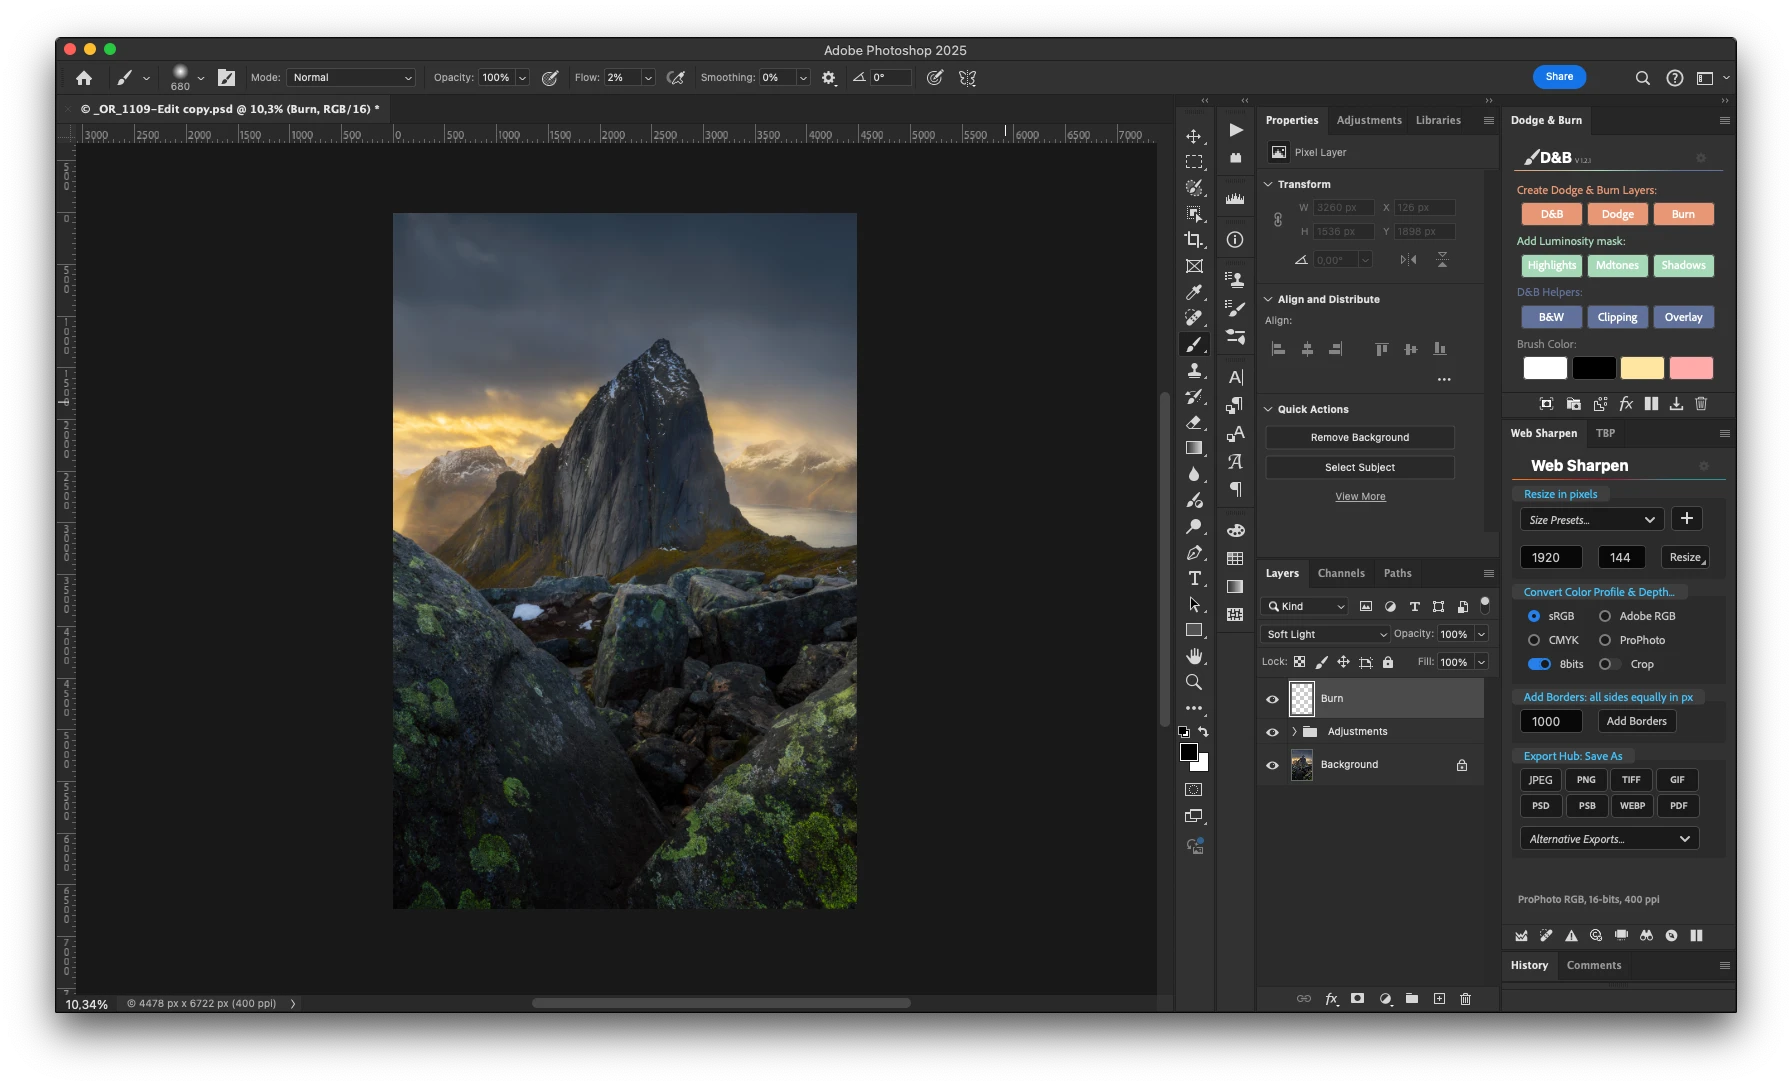
Create a new empty layer named “Burn” and set its Blending Mode to Soft Light or Overlay. This layer will be used to adjust the brightness issue in the water spots.
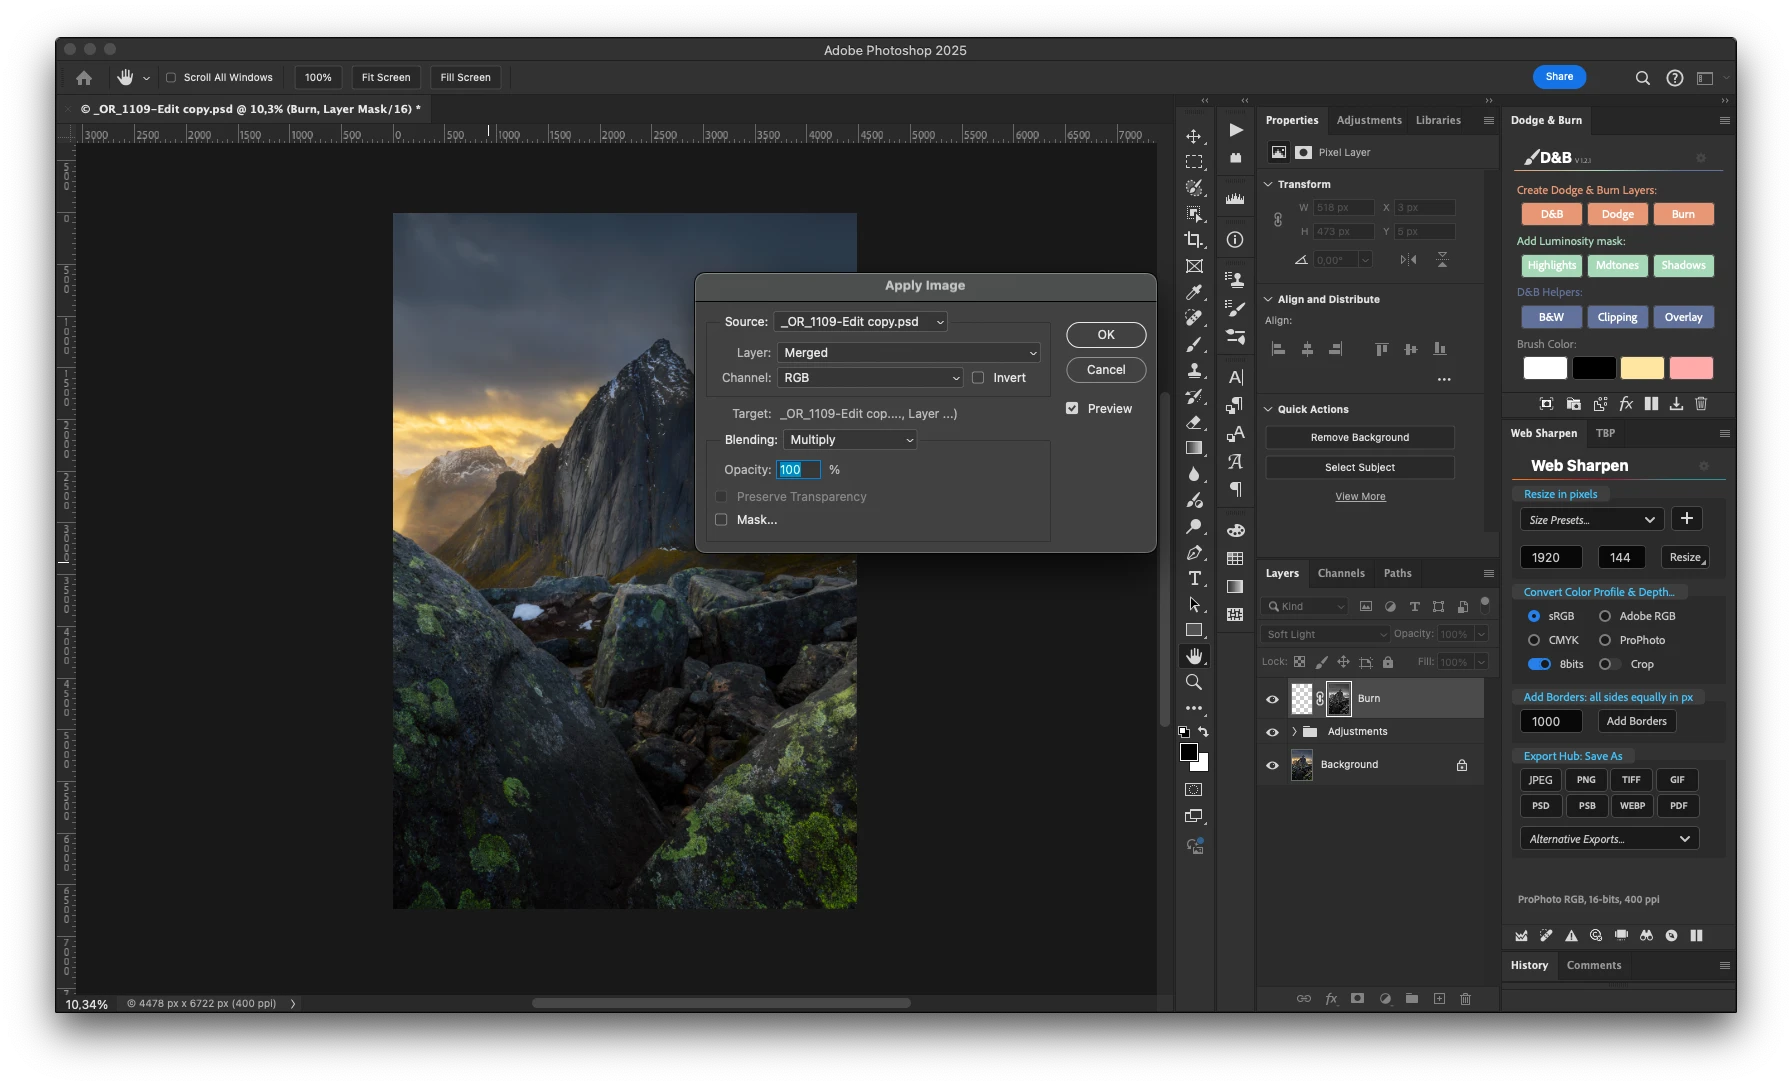
Step 2: Create a luminosity mask
To restrict the adjustments to only the water spots without affecting the surrounding areas, we’ll create a custom luminosity mask.
-
Add a layer mask to the Burn layer.
-
Select the mask by clicking on its thumbnail.
-
Go to Image > Apply Image and click OK to apply the default settings. This will transfer the highlight luminosity mask onto the Burn layer’s mask.
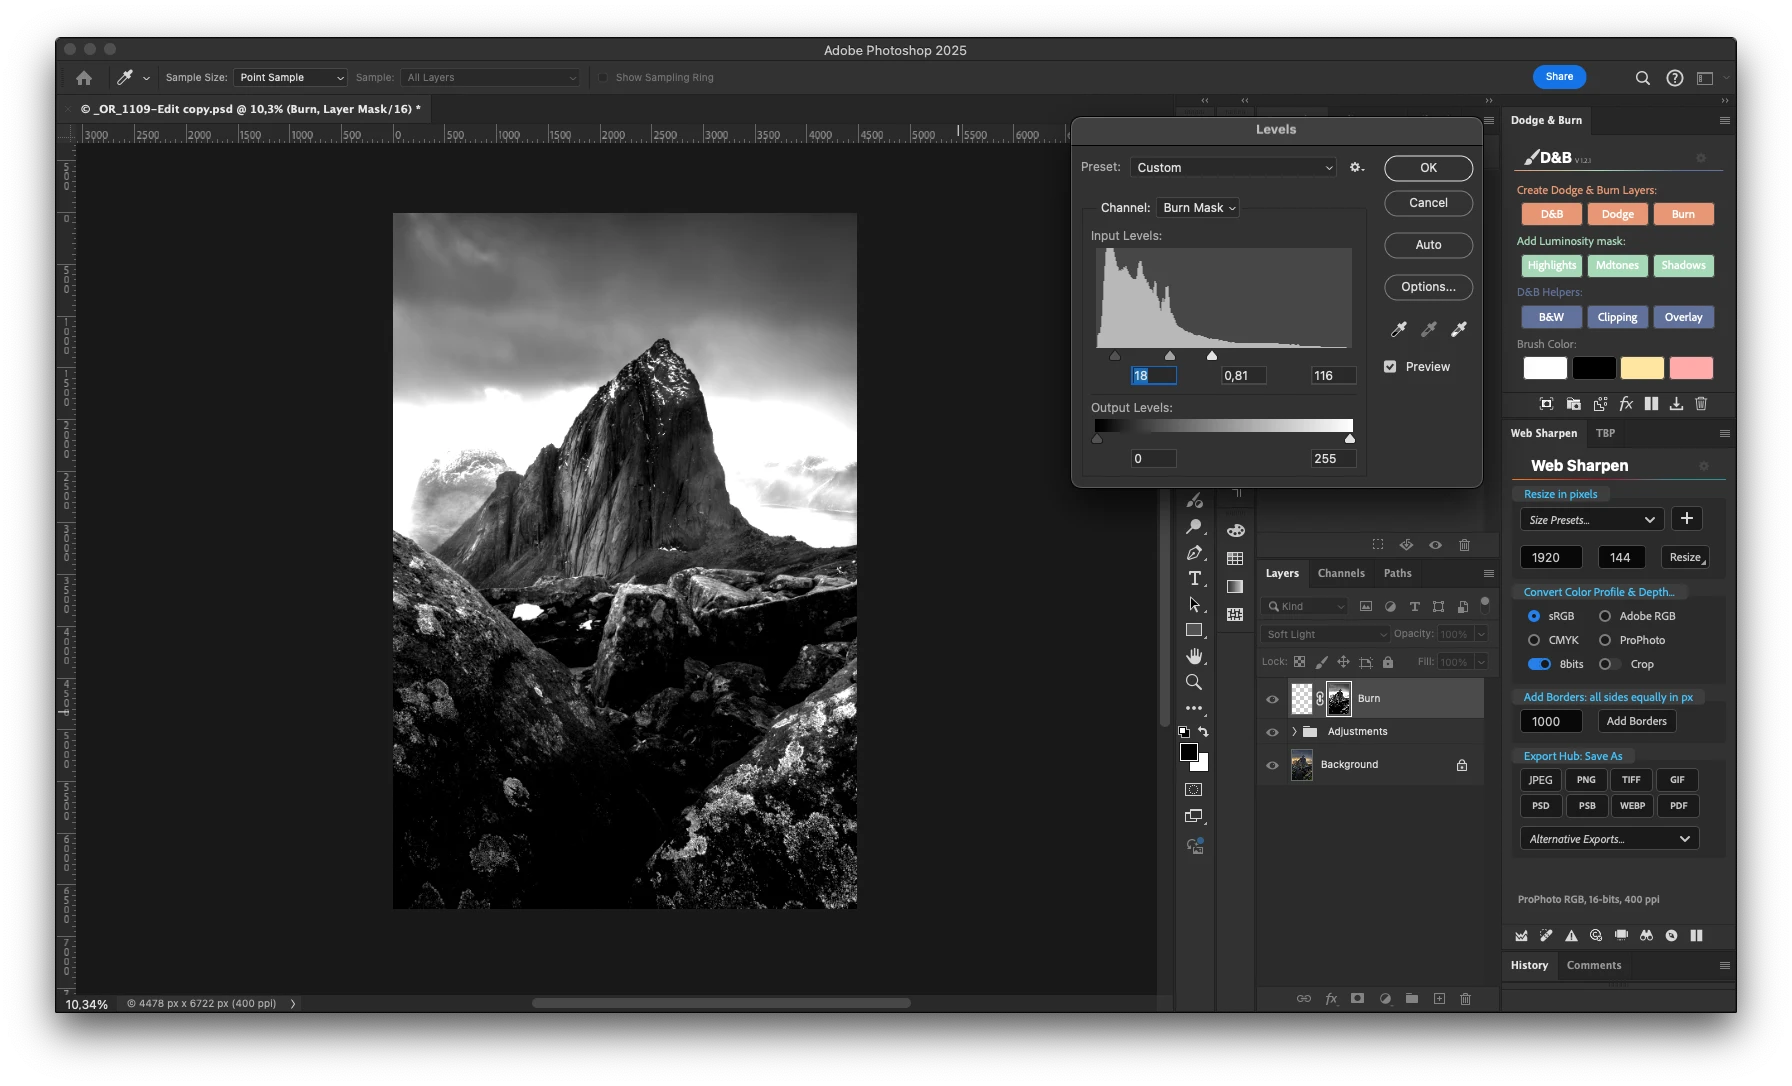
With the highlight luminosity mask applied, you may find it affects areas beyond the water spots.
To refine it:
-
Select the Mask by clicking on its thumbnail.
-
Hold down Alt (or Option on Mac) and click on the mask thumbnail to display it on the canvas, allowing you to view the mask as you adjust it.
-
Go to Image > Adjustments > Levels.
-
In the Levels window, adjust the sliders to brighten the water spots and darken the surrounding areas, effectively isolating the spots.
-
Once you are happy with the mask, click OK to finalize the refinement of the luminosity mask.
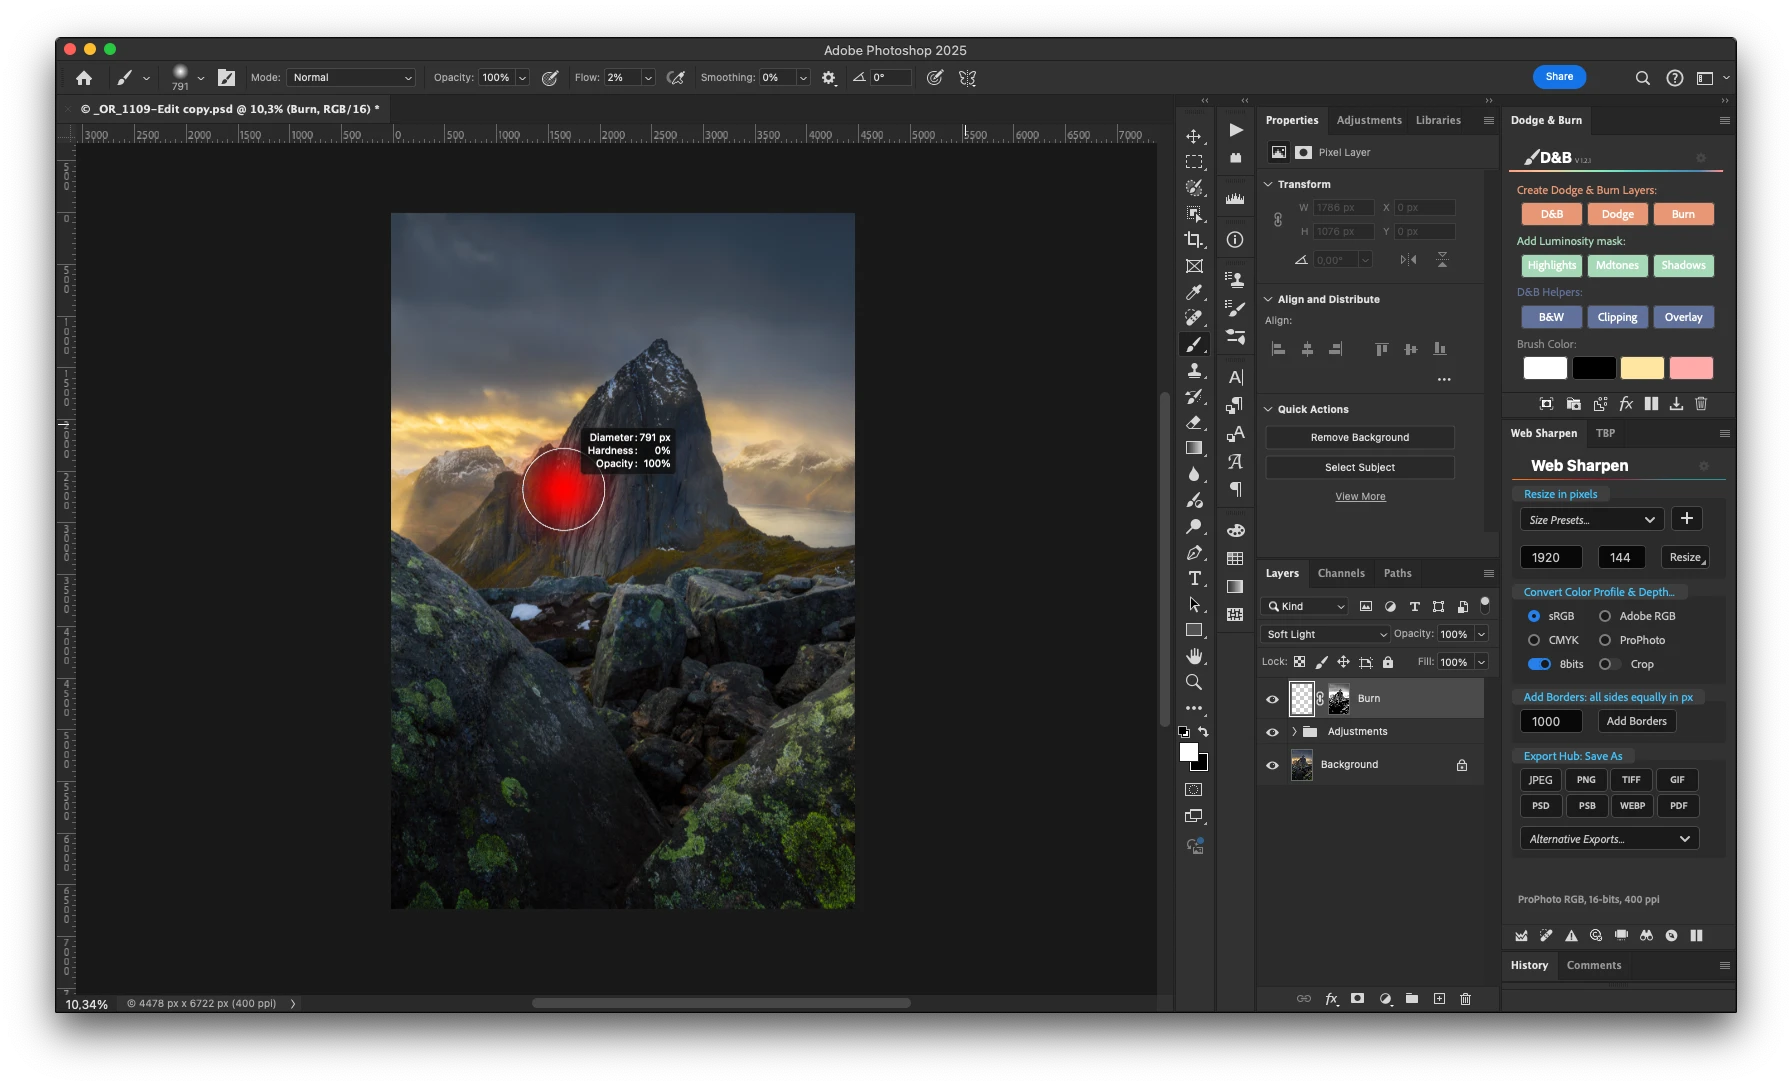
With the burn layer and custom mask now set up, we’re ready to start removing the water spots.
-
Brush Settings: With the burn layer active, select a soft brush, set Opacity to 100%, and Flow to around 2%. The low Flow allows you to build up adjustments gradually.
(I’m using a Wacom tablet for better control and precision.)
-
Painting Over Spots: Carefully start painting over the bright water spots, the key is to gradually build up the adjustment for a natural, blended effect.
-
Zoom and Check: Frequently zoom in and out to ensure the spots blend seamlessly both up close and from a wider view.
-
Toggle Visibility: Periodically toggle the burn layer’s visibility to spot any missed areas and check how well the corrections are blended into the image. Use Ctrl + , (Windows) or Cmd + , (Mac) to quickly toggle the layer’s visibility.
Step 3: Correct the colour of the water spots
Once we’ve fixed the brightness of the water spots, we can now focus on correcting their color.
-
Create a New Color Correction Layer: Create a new empty layer above the Burn layer and set its Blending Mode to Color.
-
Sampling Colors: Using the Brush Tool, hold down Alt (Windows) or Option (Mac) to sample colors from nearby unaffected areas that naturally match the discolored spots.
-
Painting Over the Spots: Carefully paint over the water spots to correct any washed-out or inconsistent colors, to restore the natural color in those areas.
Step 4: Repeat the previous steps if necessary
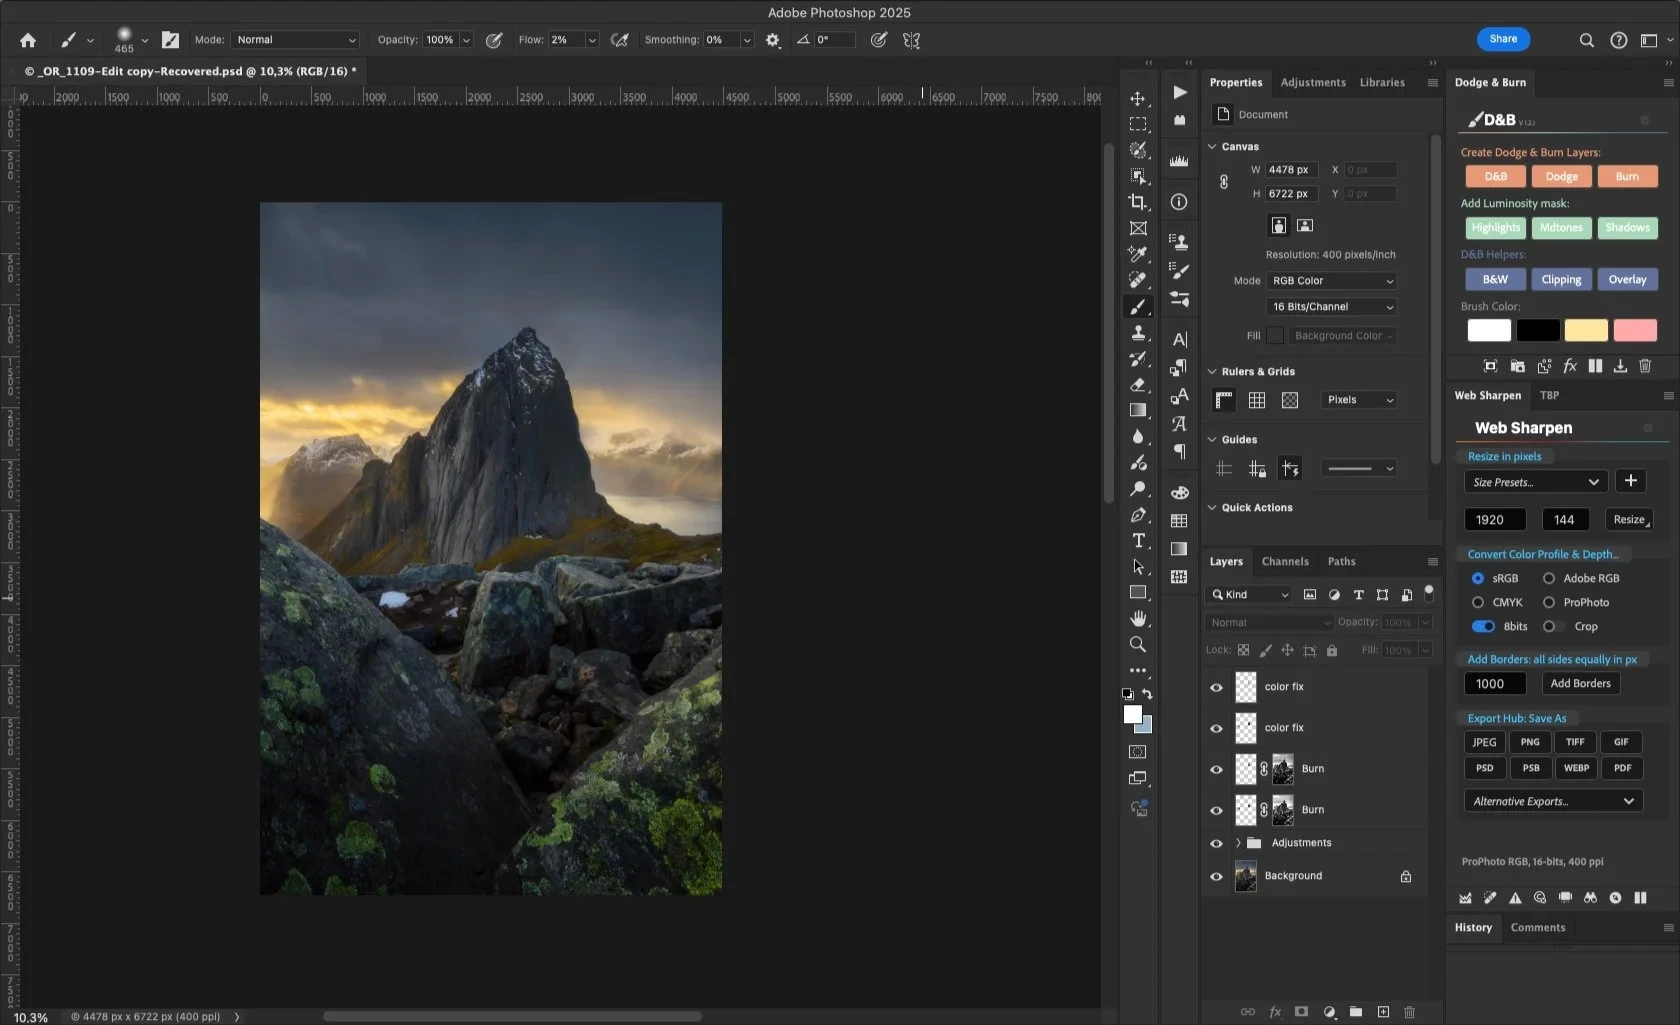
After fixing the brightness and color issues, the initial adjustments may not fully remove the bright spots. In this case, create an additional Burn layer with a custom luminosity mask, along with a Color correction layer to further refine the water spots. Adjust the layer opacity as needed to fine-tune the effect, ensuring the spots blend smoothly and seamlessly into the surroundings.
Final Thoughts
By using this technique, you can effectively remove water spots and flare artifacts without relying on cloning tools or compromising the precious details of your image. With a bit of patience and practice, this method can restore your favorite photos.
If you found this tutorial helpful and want to maximize your editing workflow with dodging and burning techniques, check out my Photoshop Dodge and Burn Plugin below. It’s packed with tools designed to streamline your editing process.
If you enjoyed this post, kindly like and share it. Also, remember to subscribe to my newsletter to stay updated with the latest tips and news.
Written and photographed by Samir Zarrouk.
About me



Questions & thoughts.
Something you’d like to ask, or a technique that worked for you? Share it below.