

Instagram carousels are a fantastic way to showcase your project or share a panoramic image in a visually engaging format. In this tutorial, I’ll guide you through creating a seamless carousel in Photoshop, from the canvas setup to the final export.
Step 1: Create a New Document
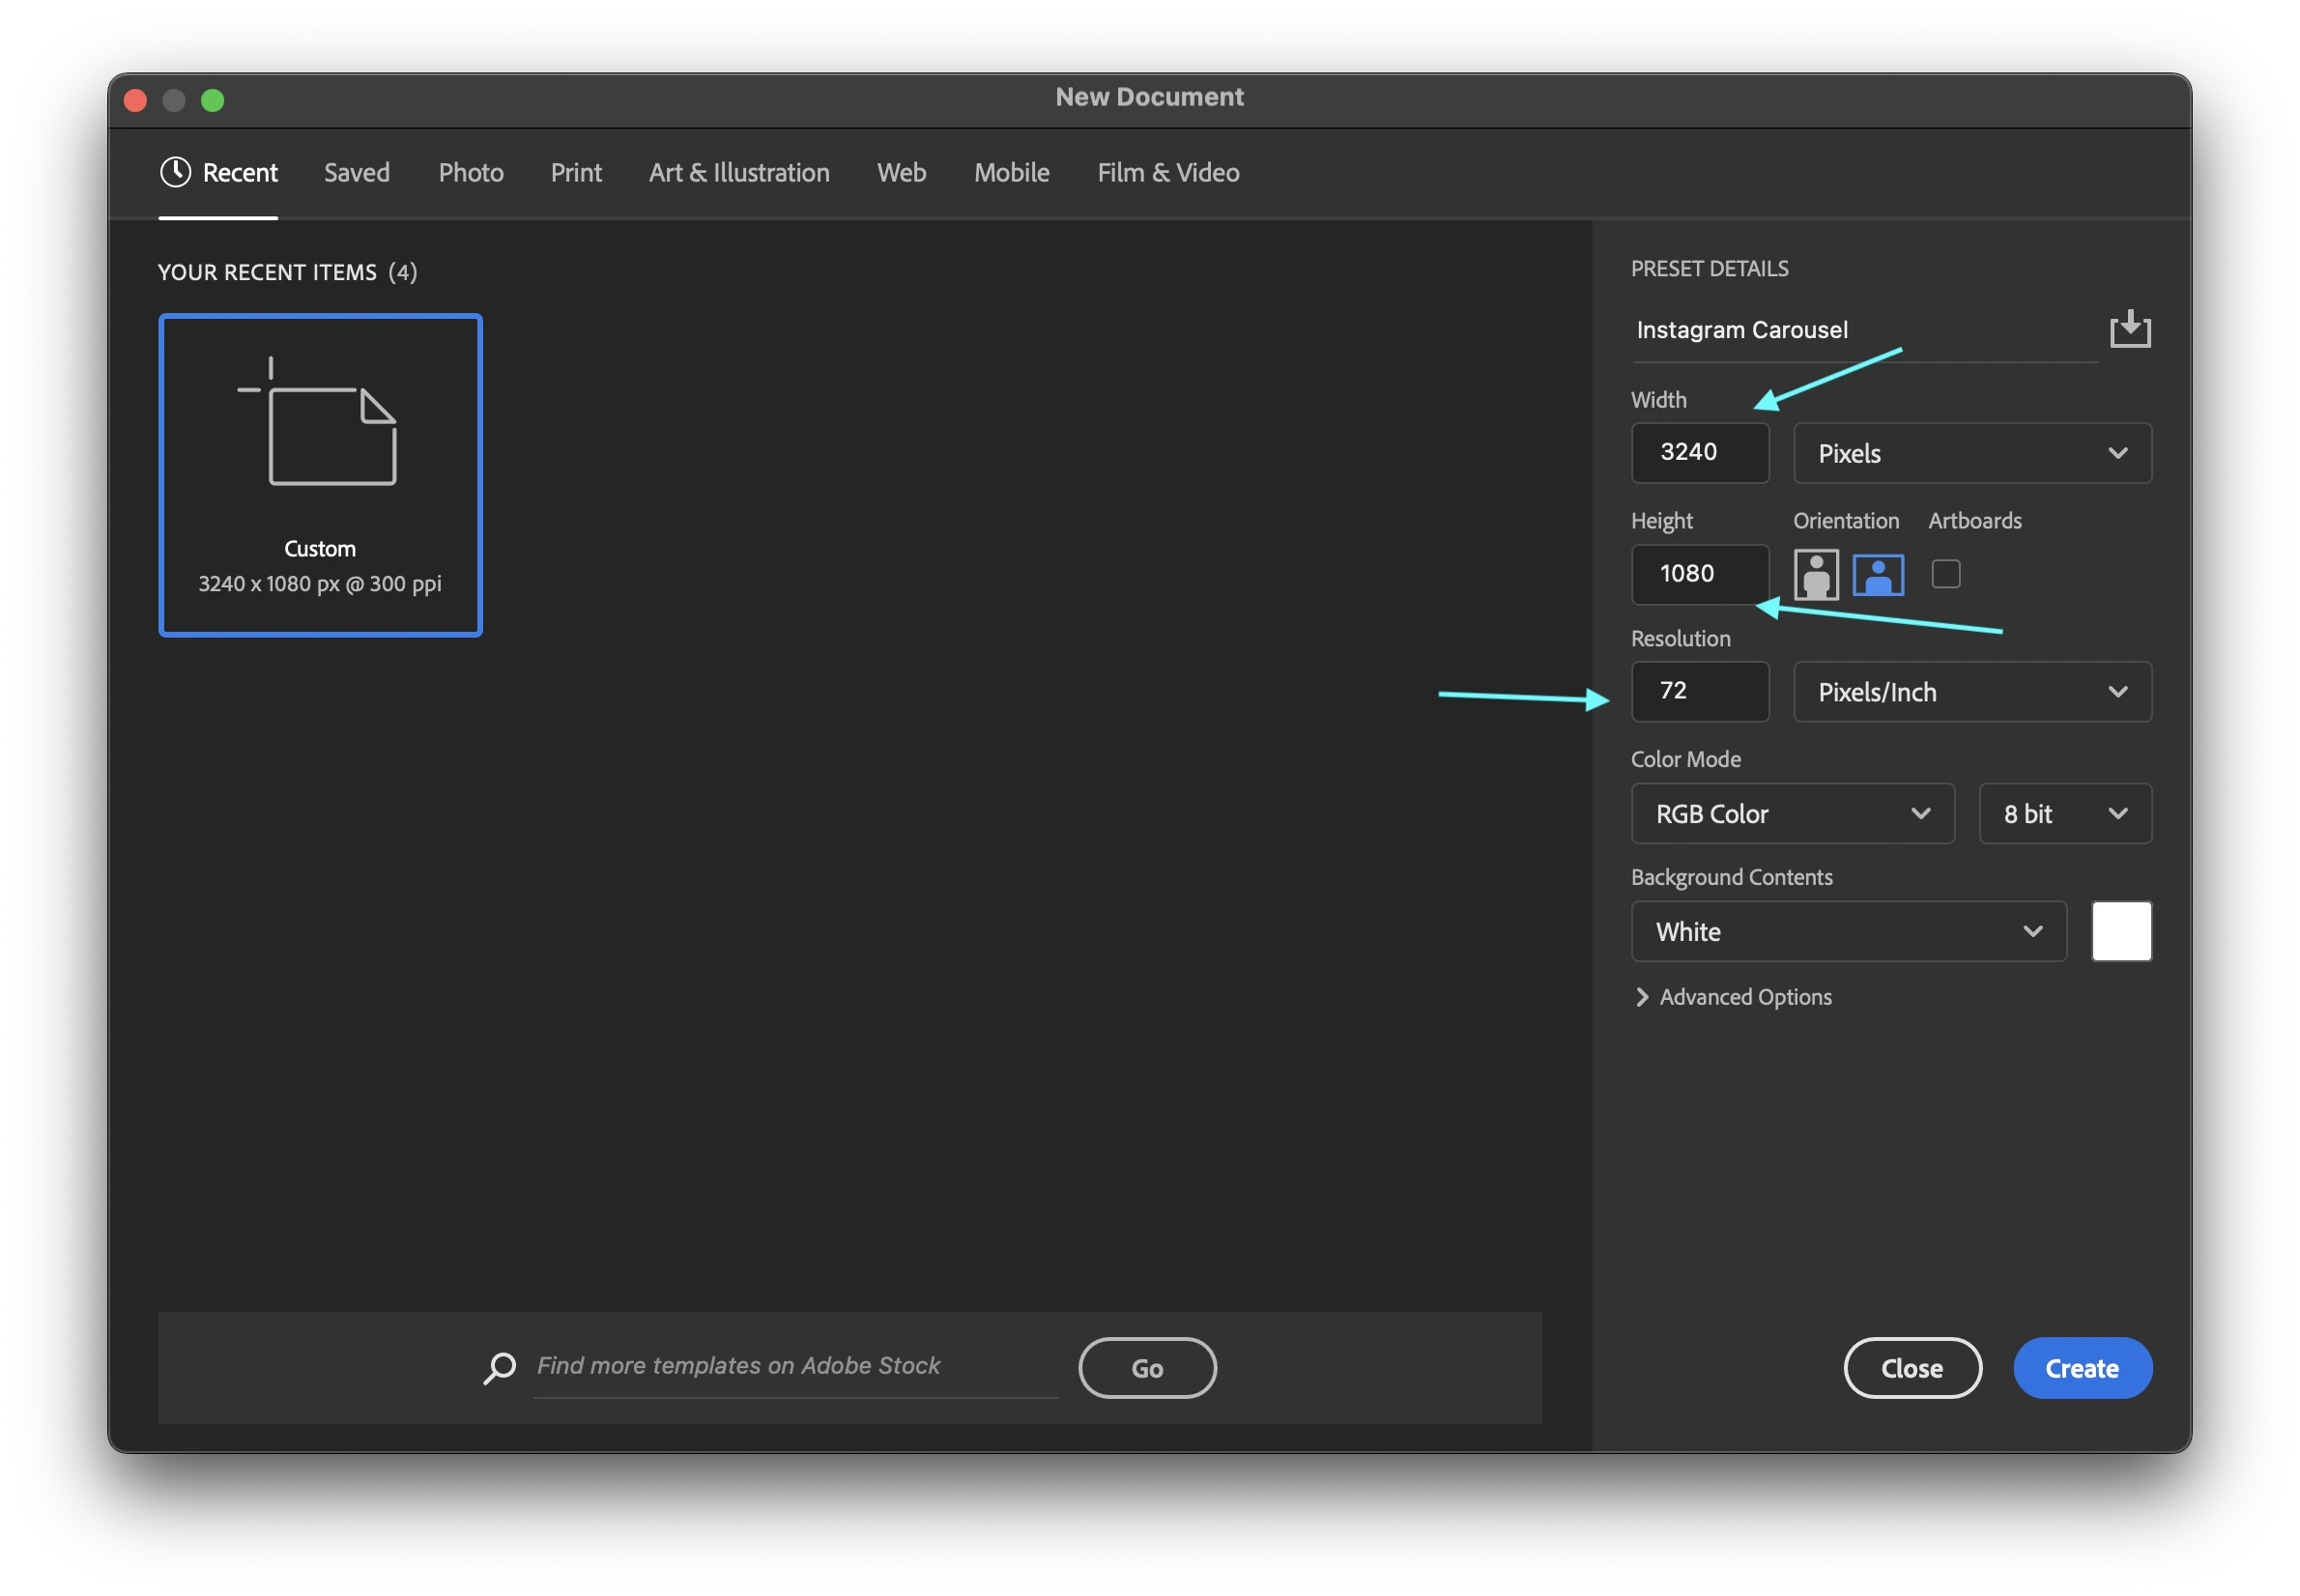
-
Open Photoshop and select File > New to create a new document.
-
Decide how many slides your carousel will have. I’m using 1080 × 1080 pixels per slide for this square carousel. Keep every slide the same size so the panorama lines up.
-
Multiply the width by the number of slides. For example:
-
3 slides = 3240×1080 pixels
-
5 slides = 5400×1080 pixels
-
-
In the New Document window:
• Enter your dimensions.
• Set the dimensions in pixels. The PPI resolution field can stay as it is; changing it alone does not add detail to a screen image.
• Choose RGB Color mode.
-
-
Once everything is set, click Create to open your canvas.
Now you’re ready to start designing your seamless carousel!
Step 2: Add Guides
We’re going to use guides to divide the canvas into equal sections, making it easy to see where each slide starts and ends. This will also set you up for precise slicing later.
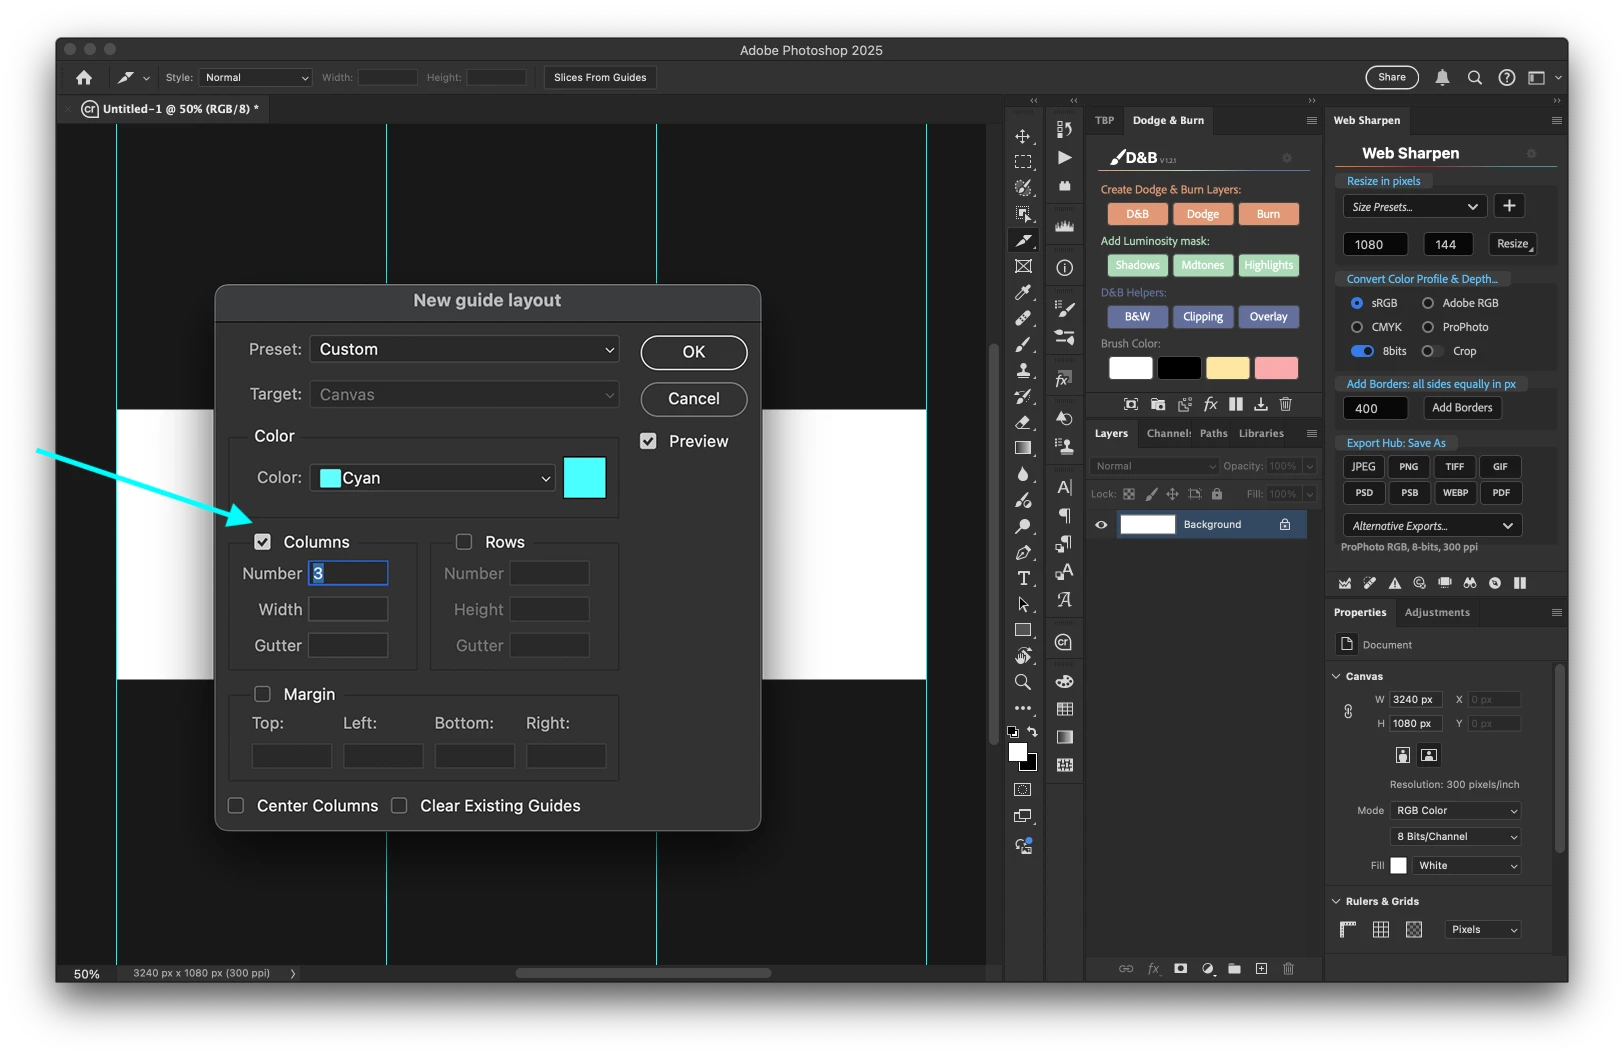
-
Go to View > Guides > New Guide Layout.
-
In the dialog box:
-
Set the number of Columns to match your number of slides (e.g., 3 for a 3-slide carousel).
-
Leave other fields like Margins and Rows blank.
-
-
Click OK to apply the guides.
Your canvas is now neatly divided into equal sections, ensuring your slides are perfectly aligned. These guides make designing and slicing your seamless carousel a breeze!
Step 3: Slice the Document
Next, we’ll use the Slice Tool to divide the canvas into individual slides.
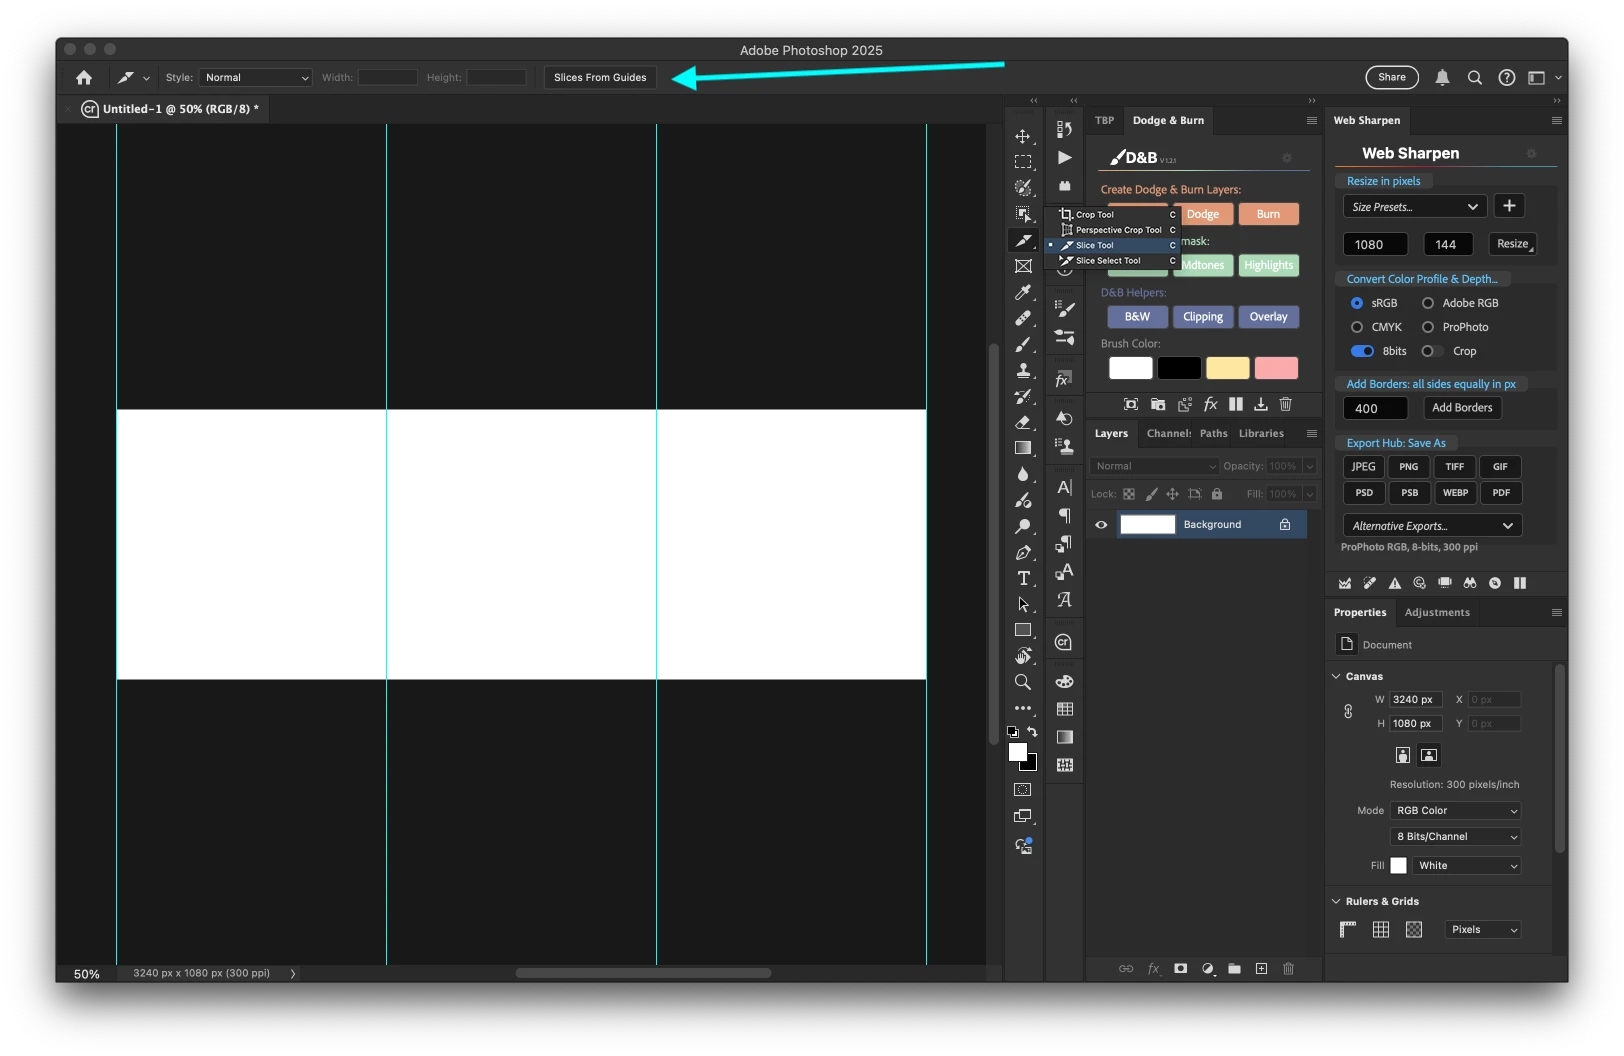
-
Select the Slice Tool from the toolbar (or press C).
-
From the options menu at the top, click Slices From Guides.
Photoshop will automatically create slices based on the guides we set earlier. Each slice represents one slide and will be ready for export in the next step. This makes it super simple to save our carousel as individual images!
Step 4: Import Your Images
Now it’s time to add our photos! We can either drag and drop the images directly into the document or use the Place Embedded feature. To do this:
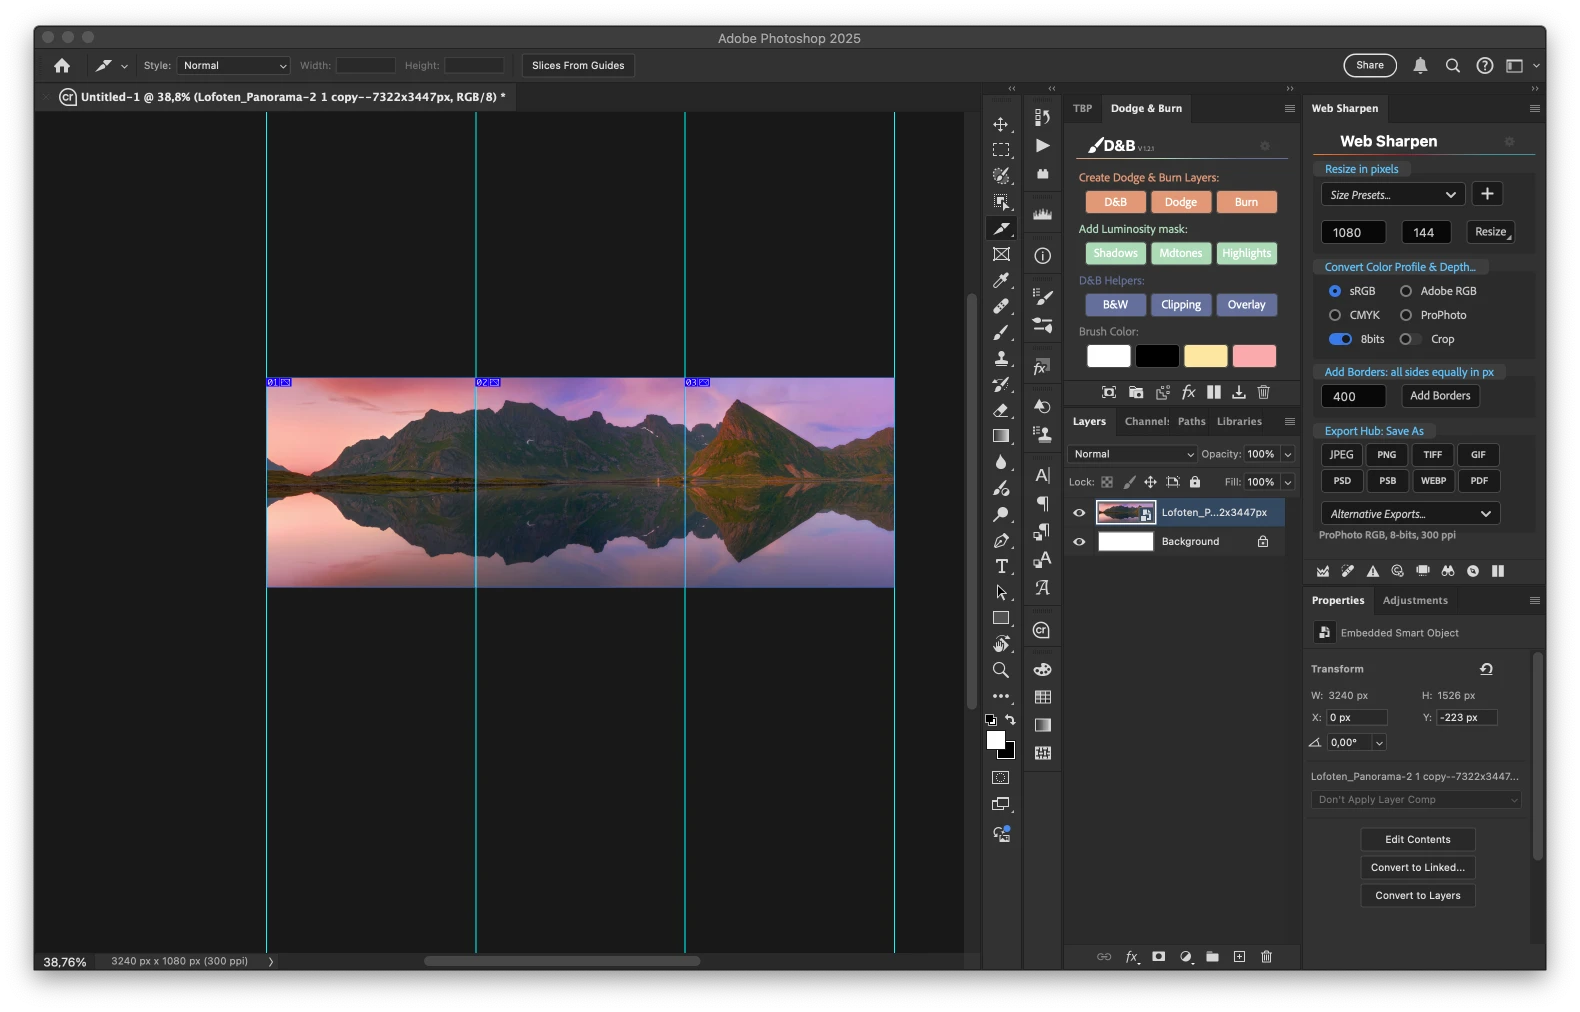
-
Go to File > Place Embedded, and choose the images from your computer.
-
For optimal flexibility, always import images as Smart Objects. This allows you to resize and transform the images without losing quality.
For example, if you’re using a panoramic image, position and scale it across all three slides to ensure a seamless transition between them. Use the Transform Tool (Ctrl+T or Cmd+T) to adjust the image size and placement until it spans the entire canvas.
Step 5: Export the Slides
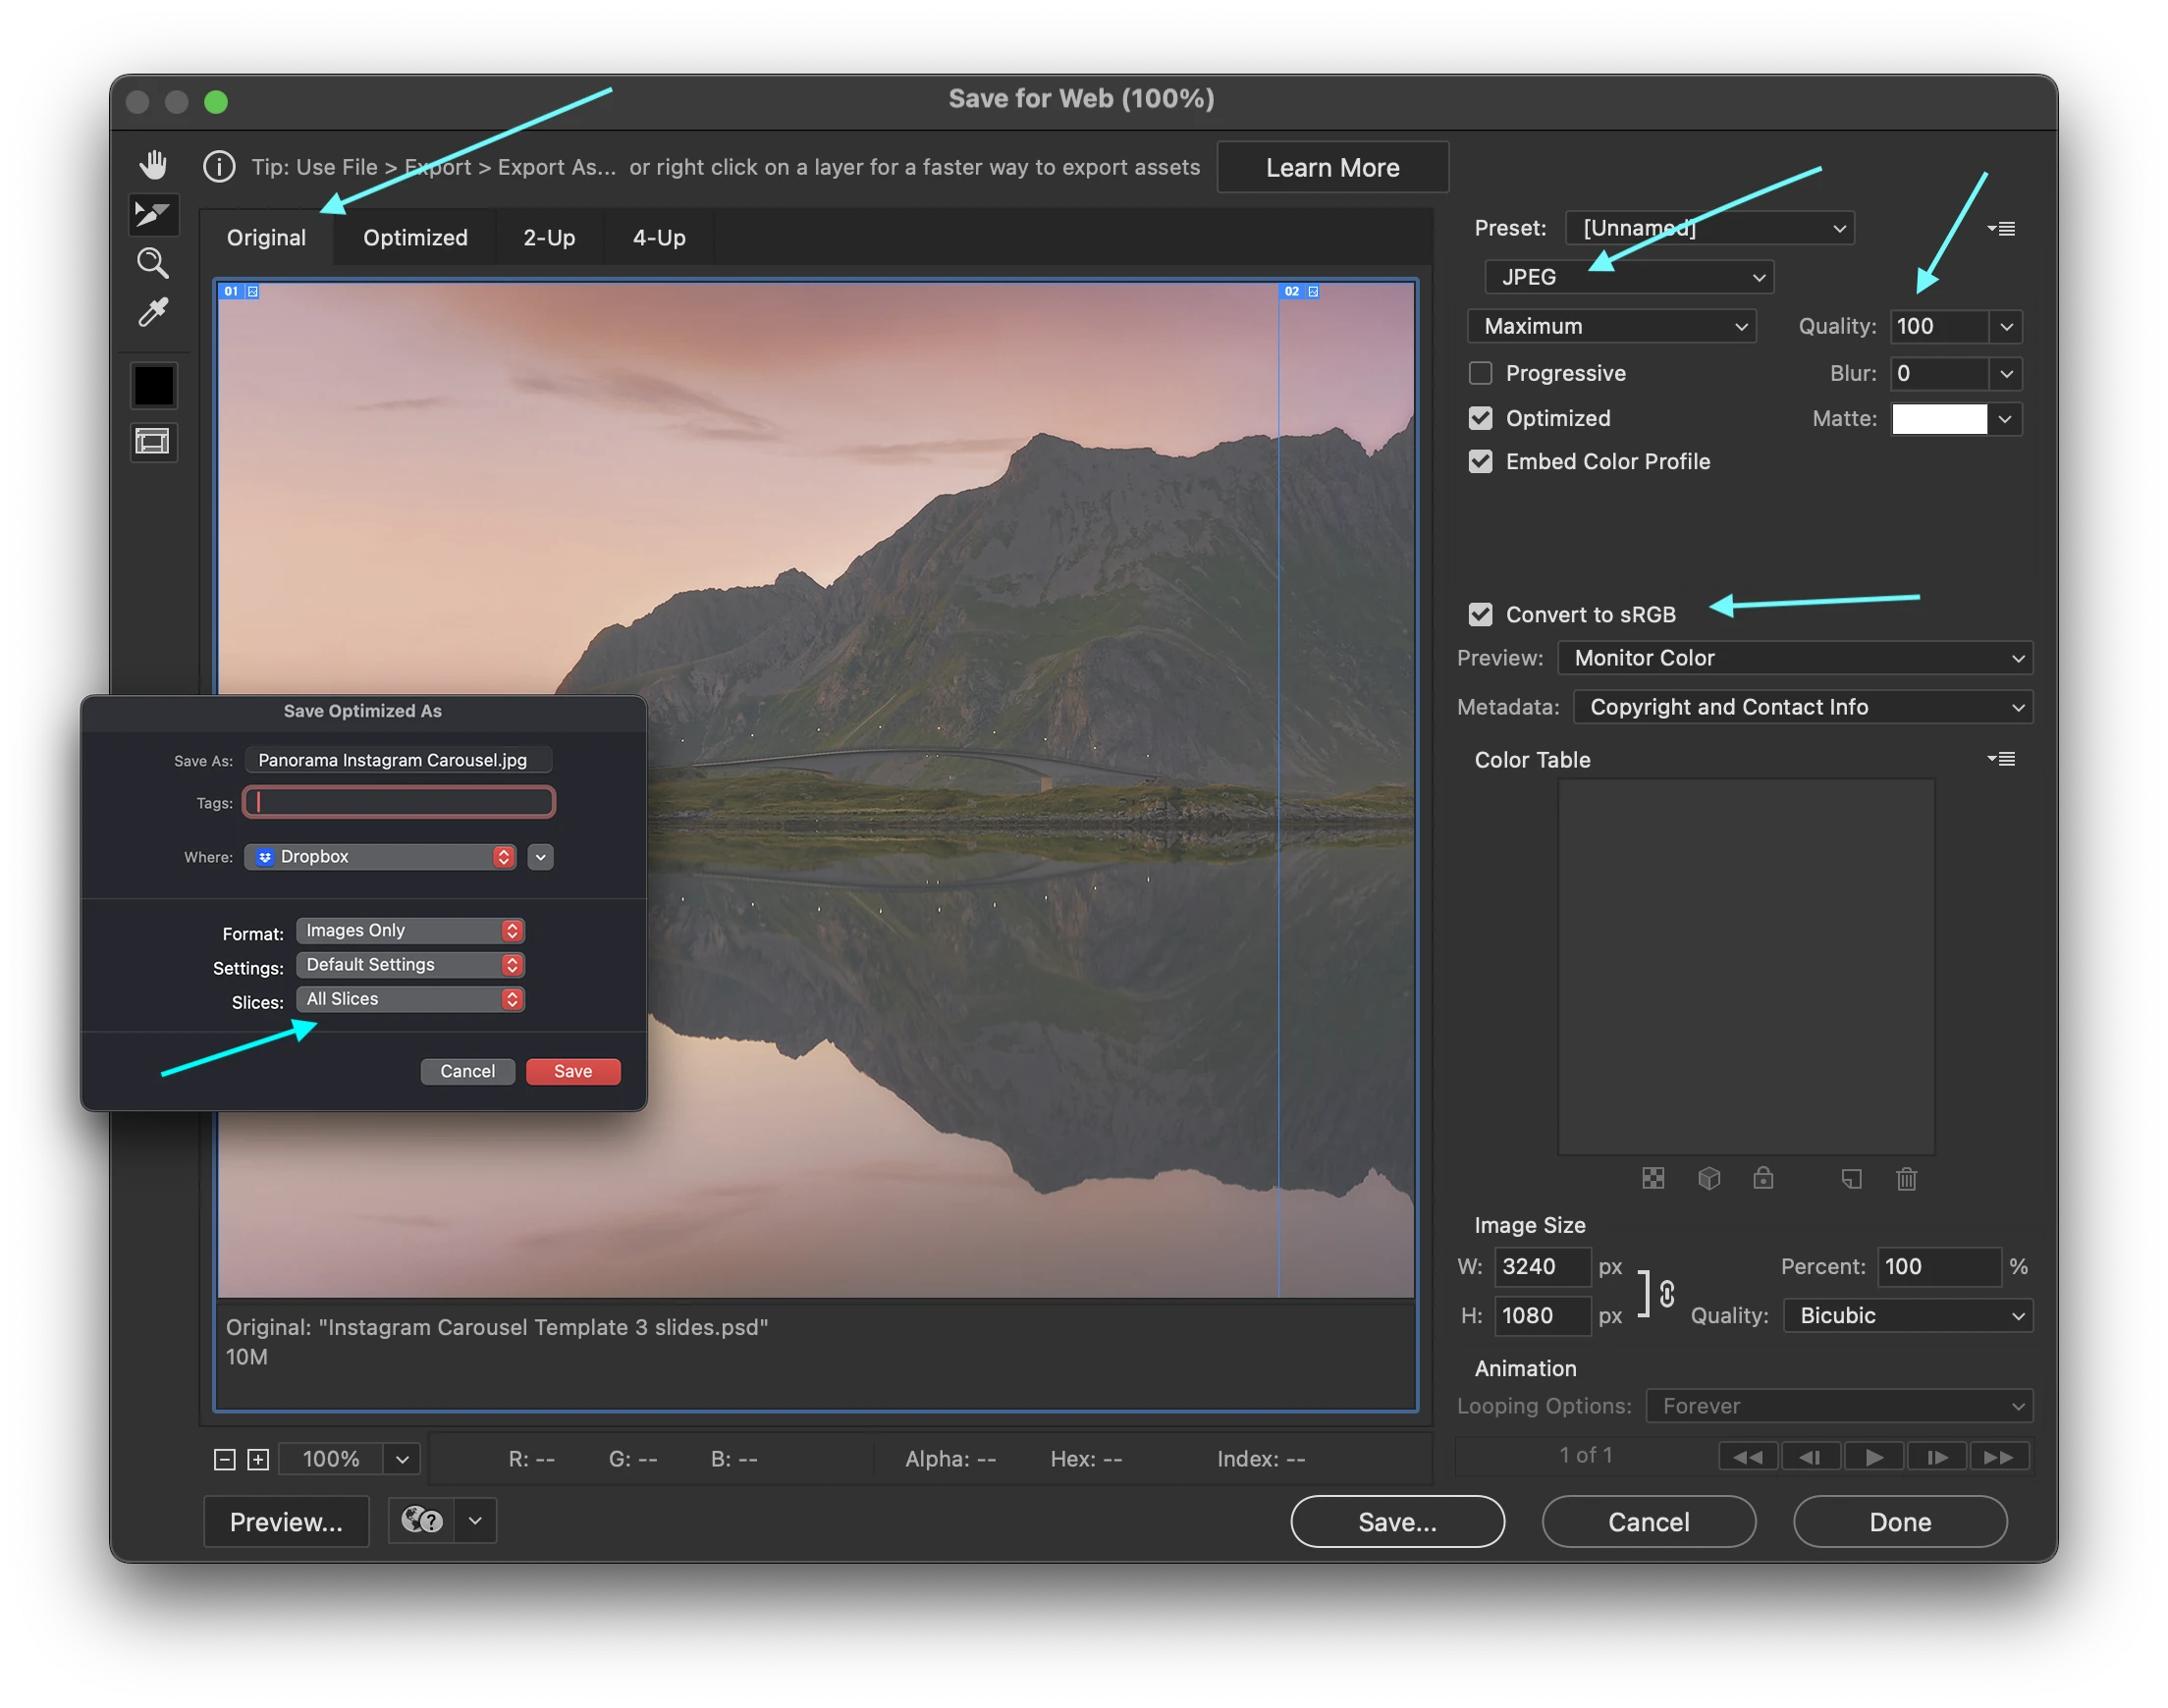
Now, let’s export our carousel slides using Photoshop’s Save for Web (Legacy) feature.
-
Navigate to File > Export > Save for Web (Legacy).
-
In the export window:
-
Click on the original view (the entire canvas), not individual slices, to ensure all images are included.
-
Adjust the quality settings (e.g., 80-100 for JPEG to maintain clarity).
-
Click Save, choose the destination folder, and make sure all slices are selected before finalizing.
-
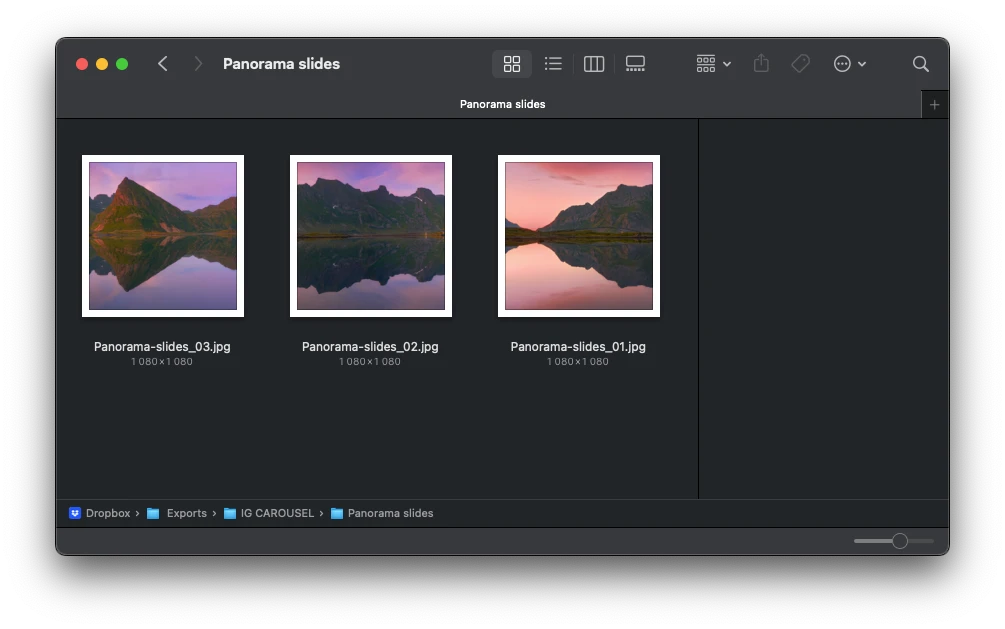
Once exported, your panoramic image will be split into individual files, ready to be uploaded as a seamless carousel!
Step 6: Upload to Instagram
Transfer the exported slides to your mobile device, or upload them directly to Instagram from your computer. Personally, I save the files directly to Dropbox for easy access across all my devices.
-
When creating a post on Instagram, select the images in the correct order to create your carousel to maintain the seamless flow.
-
Review the alignment by swiping through the preview to ensure everything lines up perfectly.
-
Finally, write a compelling caption that complements your project, and include relevant hashtags to help your post reach a wider audience.
Step 7: Save a Reusable Template
The original free PSD download is temporarily unavailable. You can build the same three-slide layout using Steps 1–3, then save it as a PSD with its guides and slices for your next carousel.
Open your saved PSD in Photoshop, add your images, and follow Steps 4–6 to complete your carousel.
Final thoughts
Creating an Instagram carousel in Photoshop is easier than it seems when you follow these steps. With a little practice, you’ll be able to design visually engaging content that grabs your audience’s attention.
Give it a try!
If you enjoyed learning how to create a seamless Instagram carousel, be sure to check out my Web Sharpening Photoshop Plugin! It allows you to create multi-post carousels in seconds and optimize your images for the web, ensuring your posts are crisply sharp and always look stunning. Take a look below!
If you enjoyed this post, kindly like and share it. Also, remember to subscribe to my newsletter to stay updated with the latest tips and news.
Written and photographed by Samir Zarrouk.
About me


Questions & thoughts.
Something you’d like to ask, or a technique that worked for you? Share it below.